...
- Calendar View: Posters are displayed by week and users can either scroll to a week or select it off a calendar.
- Calendar View:
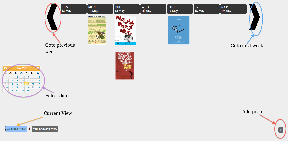
- Calendar View:
- Similar Events View: Posters are grouped by tags event organizers assign to them (e.g. talk, social etc). Posters with multiple tags are placed in multiple categories. Clicking on a tag allows users to browse events in that category. This functionality circumvents the need to need to have an explicit search button which would require typing and our studies show that typing on a vertical surface is very tedious.
- Similar View :

- Browse Tag Category:
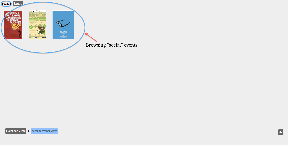
- Similar View :
- Add poster view: We implemented a slide-in panel for adding posters where the user can select a poster file, event date and time, and tags. These selections require no typing, they are accomplished through calendar widgets and drop downs. Similarly for entering email, we prompt the user to swipe their id at the RFID reader and auto-populate the email field.
- Add View:
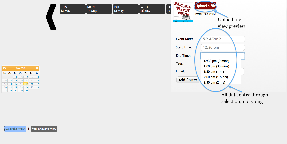
- Add View:
- *Detailed view: * When a poster is clicked on (in the calendar or similar events view), the poster is focused and the user is able to scribble on it, change scribbling color, view previous scribbles, continue a previous scribble, like/dislike a poster, get a reminder for the event by swiping an RFID card and delete the poster, also by swiping a card.
- Detailed View Example 1:
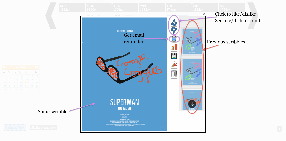
Detailed View Example 2: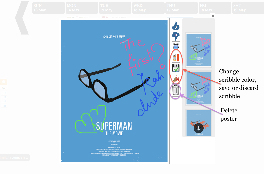
Send email reminder functionality:
- Detailed View Example 1:
...
We forwent using QR codes for adding an event to a user's calendar settling instead for sending an email reminder to the user on swiping their RFID card. ** event organizers didn't want to create them either **
One of the users could not find the button to select the poster file so we made sure that the button was clearly set apart with a sufficient color contrast
...
We implemented the project using a SmartBoard optical touchscreen that plugged into any computer's serial/USB ports for input and VGA port for output. The backend was implemented using Python using the Django web application framework and SQLite database. We also wrote a standalone websockets server for feeding the inputs from the RFID card reader to the frontend. The frontend was implemented using HTML, CSS and Javascript with a heavy reliance on the JQuery the JQuery and JQuery UI libraries as well as a few other libraries.
** Need to talk about how we used RFID reader to remove need for typing **
- the actual board was not functional until the week before GR5 was due. It was missing a crucial connecting cable to allow the smart board to communicate with the computer. After several tens of hours of conversations with Customer Service and three sets of incorrect cables, we finally got the board working. So resolution, fit to big screen cow;don't happen very well.
- rfid. we had to explore several ways to get rfid working with javascript and enable it to talk to the django server. we had to make three prototypes, two of which failed before getting a viable one. the working prototype came together the week before GR5, limiting our ability to take further advantage of it.
Evaluation
Reflection
The project turned out to be much more hardware focused than we expected since our application was heavily dependent and limited by the SmartBoard and RFID equipment. As mentioned above, the SmartBoard was not fully functional until the last week of classes.
** talk about personalization: possibilities, why we didn't do it. How would we do it **