| Anchor |
|---|
| Create an SVN patch file |
|---|
| Create an SVN patch file |
|---|
|
Create an SVN patch file- Run Eclipse, open a Project Explorer view and open the project for which you want to create an SVN patch file.
Right click on your project and select Team > Create Patch...
| indent |
|---|
2 | 2 |
!svnPatch001.jpg!
 Image Added Image Added
and a Run and save SVN diff results in a file panel similar to the following will be displayed:
| indent |
|---|
2 | 2 |
!svnPatch002.jpg!
 Image Added Image Added - In the Run and save SVN diff results in a file panel, do the following:
- In Save Patch: select In file System and enter the path/to and patch file name.
In my example my path/to is C:\tmp\ and my patch file name is csf-common-legacy.patch. - In Include changes: uncheck anything that begins with a dot (i.e. .settings, .project, .classpath, etc).
Your dialog should look similar to the following:
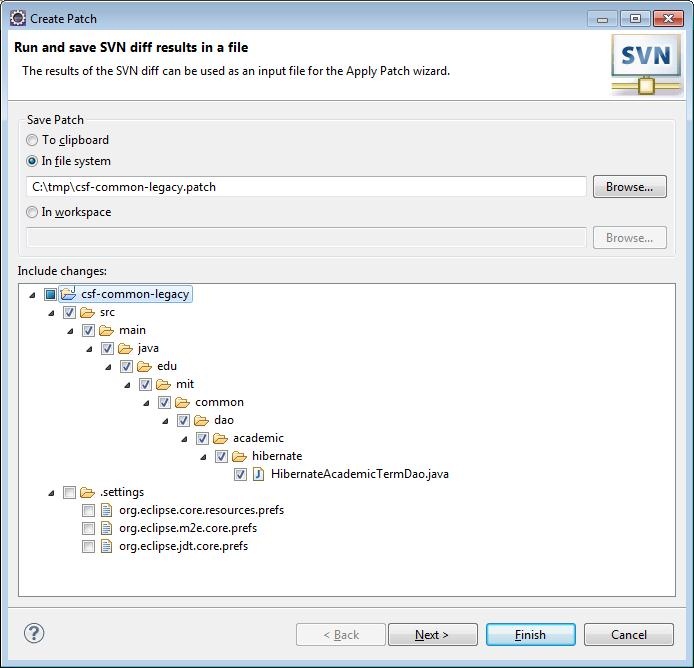
When you are satisified that everything is correct, click Next.
- In the Advanced options panel, do the following:
- In Patch Options: select Recurse into sub-folders, Process deleted resources and Process new resources.
- In Patch Root: select Project.
|