Run Eclipse, open a Project Explorer view and open the project for which you want to create an SVN patch file. Right click on your project and select Team > Create Patch...
and a Run and save SVN diff results in a file panel similar to the following will be displayed:
In the Run and save SVN diff results in a file panel, do the following:
indent
1
1
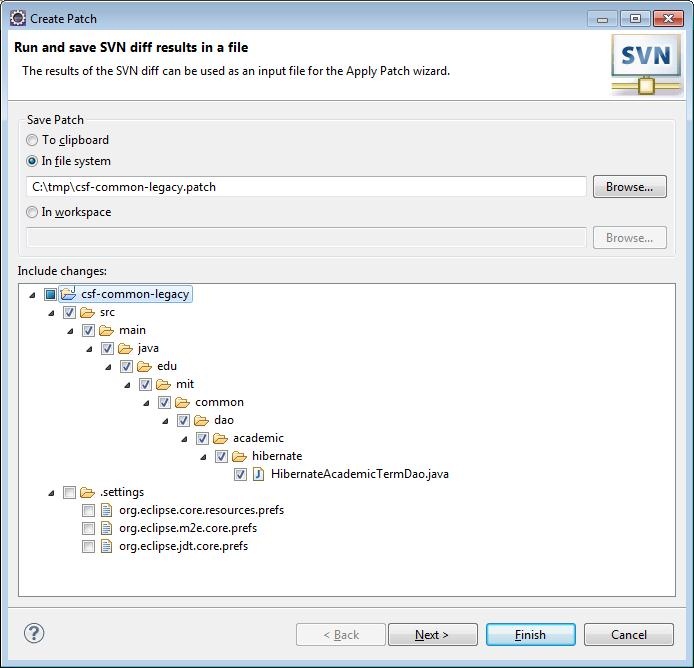
In *Save Patch*: select *In file System* and enter the *path/to* and *patch file name*.  In my example my *path/to* is C:\tmp\ and my *patch file name* is csf-common-legacy.patch.
In *Include changes*: {color:red}uncheck anything that begins with a *dot* (i.e. .settings, .project, .classpath, etc){color}.
Your dialog should look similar to the following:
When you are satisified that everything is correct, click Next.
In the Advanced options panel, do the following:
indent
1
1
In *Patch Options*: select *Recurse into sub-folders*, *Process deleted resources* and *Process new resources*.
In *Patch Root*: select *Project*.
When you are satisfied that everything is correct, click Finish.
Your patch file has now been created with the file name and in the directory that you had specified above. If you open your patch file for editing you will see a series of entries similar the following: