Design
 Image Removed Image Removed
BlahBlah1 |
 Image Removed
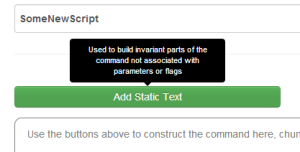
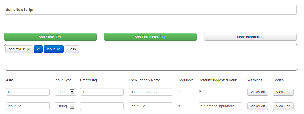
This is the screen that computational biologists see after clicking "Add/Edit Script". By clicking "Add text" and "Add parameters", they can construct the command structure that lab-bench biologists will use to run their script. They can also enter caveats and user instructions for the lab-bench biologist, then save or share the script. | Image Removed
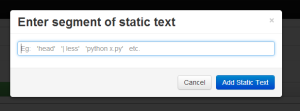
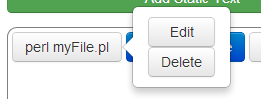
This is the popup that a computational biologist sees when clicking "Add text" from the "Add/Edit script" screen. This is where they enter static text in the command such as "perl montecarlo.pl" or "| less". |
Image Removed
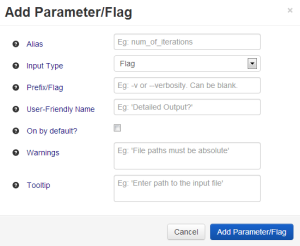
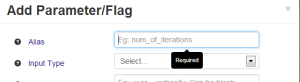
This is the popup that a computational biologist sees when clicking "Add parameter" from the "Add/Edit script" screen. This is where they enter information about each of the parameters that the lab-bench biologist will have the option of setting when running the script.
| Image Removed
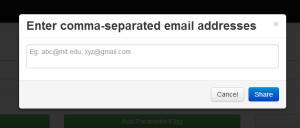
This is the popup that a computational biologist sees when clicking "Share" from the "Add/Edit script" screen. Here they have the option of sharing the script with their existing contacts in BioMate or entering an email address. | Image Removed
This is the home screen that both computational biologists and lab-bench biologists see. Our second high-level task was for lab-bench biologists to run a script, so they clicked "Run Script".
|
Image Removed
This is the screen that lab-bench biologists see after clicking "Run Script". By clicking "My Notes on Monte Carlo", they can view any notes they have previously created on the Monte Carlo script. By clicking "Instructions", they can view any caveats or instructions written by the programmer. Then the lab-bench biologist can enter the parameters and generate the command.
| Image Removed
This is the popup that a lab-bench biologist sees when clicking on "Instructions" from the "Run script" screen. It shows both caveats and instructions shared by the computational biologist. | Image Removed
This is the popup that a lab-bench biologist sees when clicking "Generate Command" after entering the required and optional parameters. Here they can copy the command and paste it into a terminal to run. They also have the option of saving the command to their notes. |
Image Removed
This is the popup that a lab-bench biologist sees when adding a note on a particular script. They can see all previous notes on this script as well as previous versions of the command they have saved to their notes. | Image Removed
This is the popup a lab-bench biologist sees when clicking on "Save Parameters" from the "Run Script" screen. This allows them to save all the parameters for a particular run with a unique name. | Image Removed
This is the popup that a lab-bench biologist sees when clicking on "Load Parameters" from the "Run Script" screen. This allows them to load parameters that they have previously saved for the given script.
|
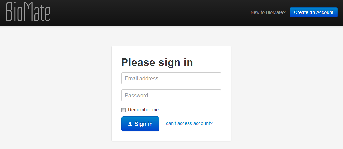 Image Removed
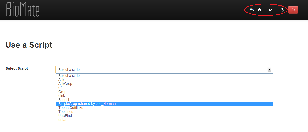 Image Removed
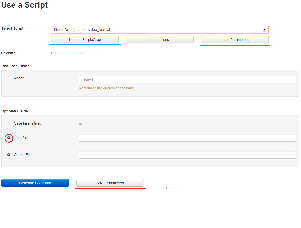 Image Removed
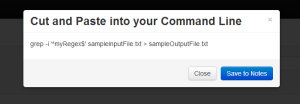 Image Removed
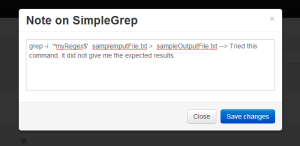 Image Removed
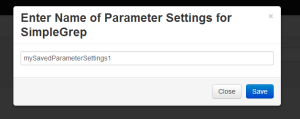 Image Removed
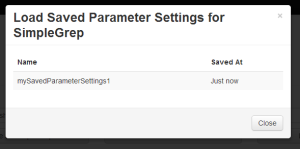 Image Removed
 Image Removed
Our final design focused on simplicity and learnability for lab-bench biologists and learnability and efficiency for computational biologists. One major design decision was whether to make two separate interfaces for the two user groups or to make a common interface for both. We decided to design a common interface because, the roles of our two user groups are not totally isolated and overlap in a number of tasks. We tried to make the most common task of a lab-bench biologist which is generating the command for using a script, simple, intuitive and learnable. On the other hand, we tried to design the task of creating or editing a script to be as efficient as possible since the computational biologists are efficient users of computers. We incorporated support for both keyboard and mouse actions throughout our interface (e.g. tabbing through fields, click vs enter etc.).
| On the login page, we wanted to make the actions “Sign in” and “Create an account” more visible, so we used big blue buttons for them. We tried to make the placement of these buttons externally consistent with popular web applications like gmail. |
Image Added | The design of our landing page went through a number of revisions. The design considerations were - what actions to put in the action wheel, how the actions should be placed, how to remove ambiguity from the names of the actions, whether the labels of the actions should be hidden or displayed, what icons to use etc. - We decided to put the four actions in the action wheel which we found to be the most important ones based on our needfinding and user feedback from paper prototype test.
- We placed the actions on a circular action wheel to get the advantage of proximity by Fitt’s law.
- We followed the principle of “less is more” while choosing icons for actions.
- We changed the name of the action “Run Script” to “Use a Script” because during paper prototype tests some users felt they would only click on a button labeled "Run Script" if the script had already been loaded. They also were confused about clicking on "Run Script" if they just wanted to access their previously saved settings for a script, and not necessarily run it.
- We made the action buttons big and clearly labeled them so that users can get a sense of the purpose of each action right away just by looking at it.
We also made the “Sign out” button red with a commonly used icon and placed it at the top right corner so that, it is more visible to the users.
|
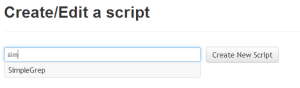
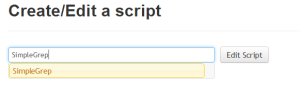
Image Added | - In our initial design we put only home and sign out buttons at the top navigation bar, so the user was forced to go back to home page if he wanted to perform a different action. Later we decided to include “Use a Script” and “Create/Edit a Script” actions on the top navigation bar since a computational biologist user might want to switch between them frequently. However, we did not include “Notes” and “History” because notes associated with a particular script is available on the script’s page and history is also available in the form of saved parameters.
- The script names in the “select script” dropdown list appear in alphabetical order. We also decided to display the name of the author of a script if it was shared by someone else so that no ambiguity arises when scripts with same names but different authors exist.
|
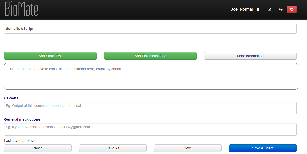
Image Added | - The primary goal of a user on the page of particular script is to generate the command for using the script. So we made the “Generate Command” button big and blue.
- The notes associated with a script is available on click on the notes button which is placed right under the name of the selected script, so that user doesn’t miss it. Also the history of runs for this particular script that the user saved is readily available on click on the “Load Parameters” button.
- If there is a tooltip available for a particular field, a “?” icon is shown at the left of the label of that field. This setting of tooltips is quite common in web applications.
- Warnings about different fields are shown just below the textbox associated with it. We use proximity of placement of warnings to textboxes and increased whitespace among two textboxes to give the user a sense of which warning is associated with which textbox.
|
Image Added | BlahBlah4 |
Image Added | BlahBlah |
Image Added | |
Image Added | |
Image Added | |
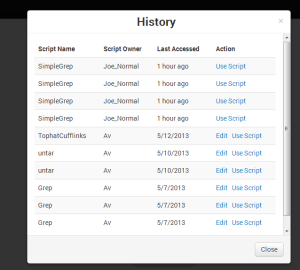 Image Added Image Added | |
...