| Info |
|---|
Help is available by sending an email to csf-support@mit.edu |
| Panel | |||||||
|---|---|---|---|---|---|---|---|
|
| Note |
|---|
The SVN repository for the jar template has moved to svn+ssh://svn.mit.edu/es-common-services-framework/es-project-template/jar-template/trunk. |
| Panel | ||||||
|---|---|---|---|---|---|---|
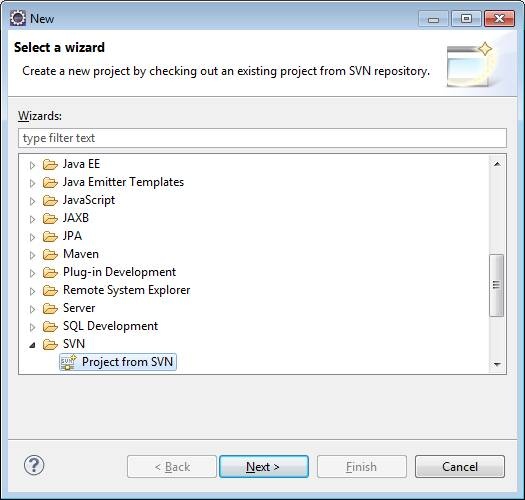
OVERVIEWThis document contain the instruction on how to install and configure your project's JAR component using the jar-template. The screen shots are taken from the Eclipse Java EE IDE for Web Developers - Version: Indigo Service Release 2 IDE. If you are using a different version of Eclipse Java EE or a different variant of Eclipse, the screen shots may differ. It is important to keep in mind that the following instructions should be viewed as to what has to be done rather than how to do it. There are 3 sections to this document. These sections are:
It should take you approximately 10 - 20 minutes to get your jar component created and customized. |
| Panel | ||||||||||||||||||||||||
|---|---|---|---|---|---|---|---|---|---|---|---|---|---|---|---|---|---|---|---|---|---|---|---|---|
Anchor | | Creating the project jar component using the jar-template | Creating the project jar component using the jar-template | |||||||||||||||||||||
| Code Block |
svn+ssh://svn.mit.edu/es-common-services-framework/es-project-template/jar-template/trunk
|
{code} For the *Label*, select: *use the repository URL as the label |
* For the *Authentication*, enter your *User* name and *password |
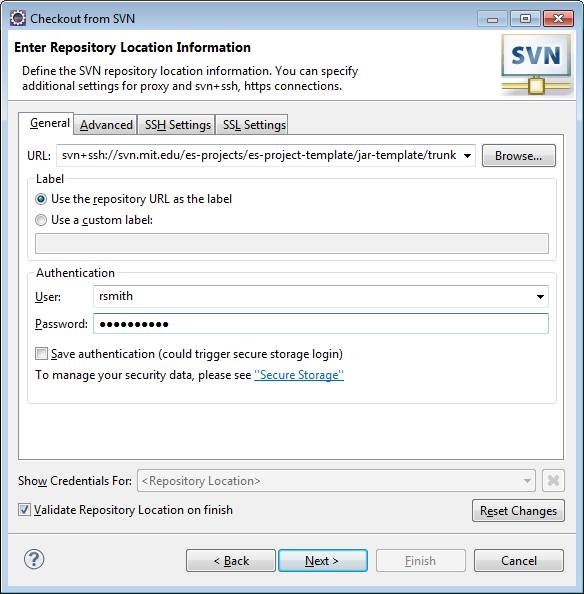
When satisfied that everything is correct, click Next.
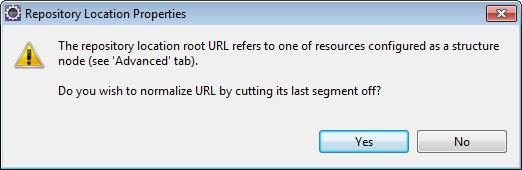
You do not want to normalize the URL!
click No.
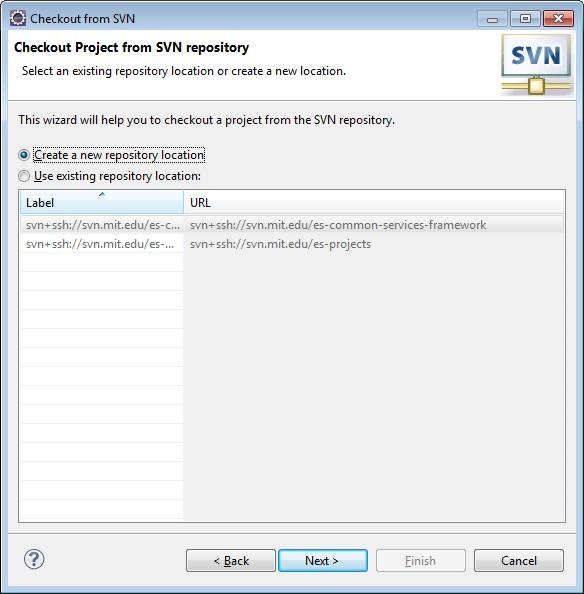
*. !setupJarTemplate006.jpg! When satisfied that everything is correct, click *Next*. # The *Repository Location Properties* panel is a warning panel. !setupJarTemplate007.jpg! You do not want to normalize the URL! click *No*. # In the *Select Resource* panel, select {code} svn+ssh://svn.mit.edu/es-common-services-framework/es-project-template/jar-template/trunk {code} |
as shown in the following panel: |

When satisfied that everything is correct, click Finish.

When satisfied that everything is correct, click Finish.
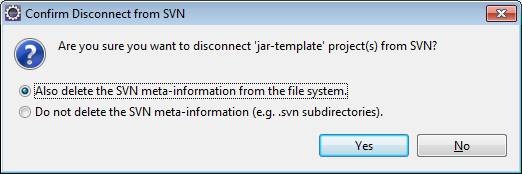
When the following Confirm Disconnect from SVN panel is displayed, select Also delete the SVN meta-information from the file system.
When satisfied that everything is correct, click Yes.
Right click on the jar-template project and select Rename....
Replace jar-template with the short project acronym that you have previously selected. If you have not selected a short project acronym, please go to Selecting names for your project before continuing.
Prefix a csf- to the short project acronym to denote that this is the jar component of your project.
For example: If my short project acronym was att, then my panel would look like the following:
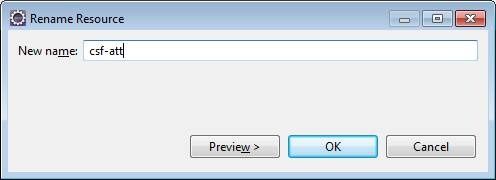
When satisfied that everything is correct, click OK.
| Code Block |
|---|
<name>jar-template</name>
|
Prefix a csf- to the short project acronym to denote that this is the jar component of your project.
For example: If my short project acronym was att, then the line would look like the following:
| Code Block |
|---|
<name>csf-att</name>
|
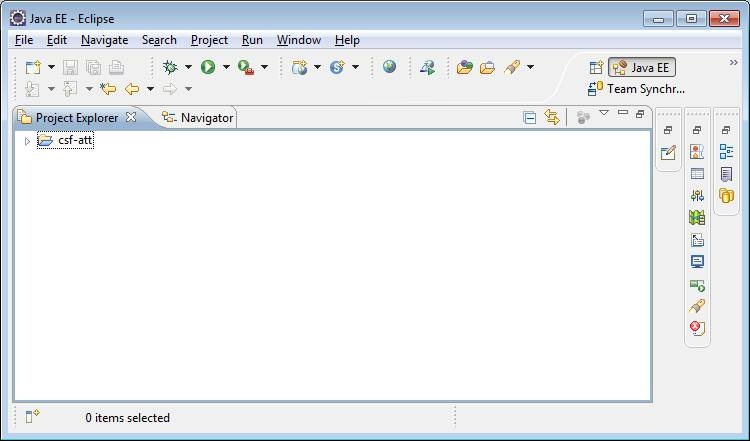
Maximize your IDE.
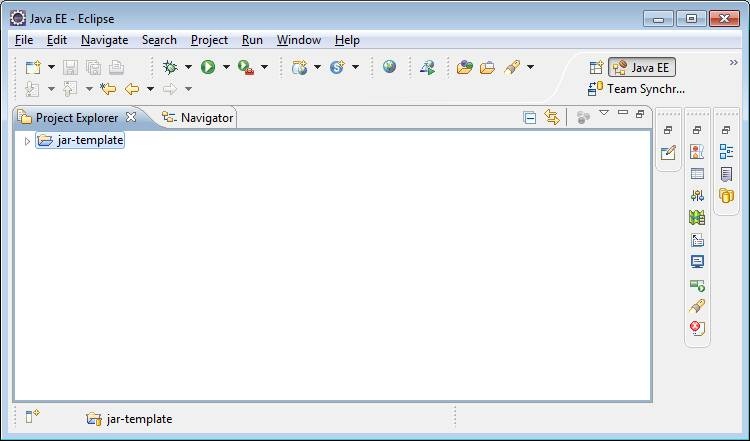
Expand your project and it should look similar to the following:

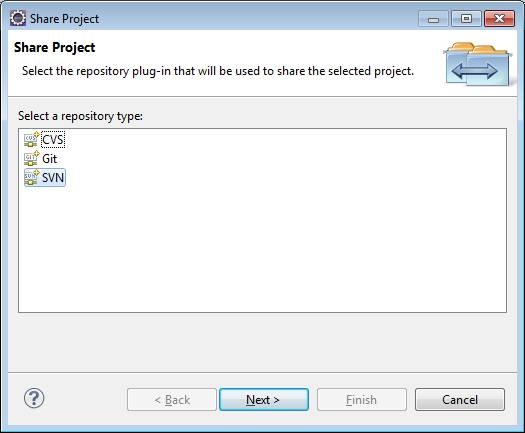
Select SVN as shown below:
When satisfied that everything is correct, click Next.
When satisfied that everything is correct, click Next.
The SVN repository that you should use is
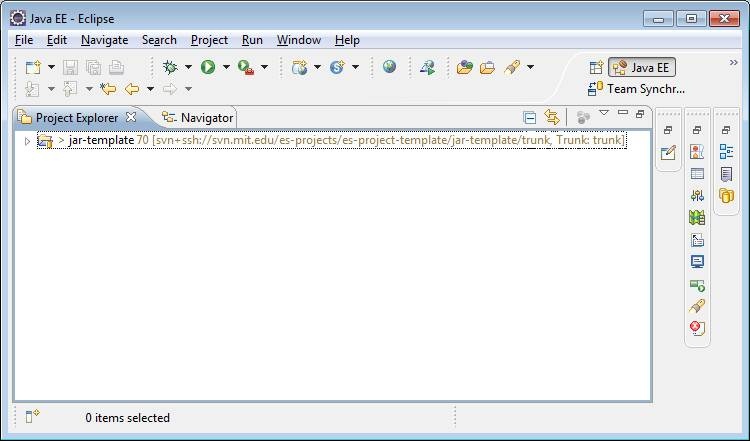
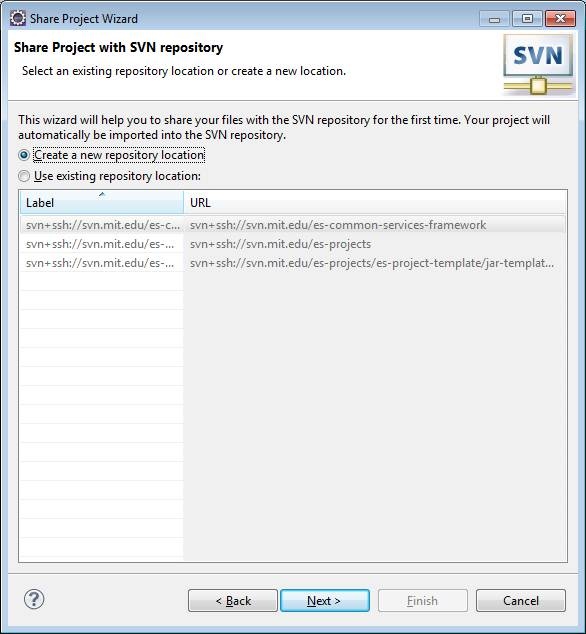
!setupJarTemplate008.jpg! When satisfied that everything is correct, click *Finish*. # In the *Check Out As* panel, select *Check out as a project with the name specified:* as shown in the following panel. !setupJarTemplate010.jpg! When satisfied that everything is correct, click *Finish*. # Your *Eclipse - Project Explorer View* should now look similar to the following: !setupJarTemplate011.jpg! # Right click on the *jar-template* project and select *Team > Disconnect* When the following *Confirm Disconnect from SVN* panel is displayed, select *Also delete the SVN meta-information from the file system*. !setupjarTemplate012.jpg! When satisfied that everything is correct, click *Yes*. # Open the Eclipse *Project Explorer View*. The view should look as follows: !setupJarTemplate014.jpg! Right click on the *jar-template* project and select *Rename...*. Replace *jar-template* with the *short project acronym* that you have previously selected. If you have not selected a *short project acronym*, please go to [Selecting names for your project | Selecting names for your project#Selection of a short project acronym] before continuing. {color:red}Prefix a *csf-* to the *short project acronym* to denote that this is the jar component of your project.{color} For example: If my *short project acronym* was *att*, then my panel would look like the following: !setupJarTemplate016.jpg! When satisfied that everything is correct, click *OK*. # The *Eclipse - Project Explorer View* should look similar to the following: !setupJarTemplate018.jpg! # Minimize your IDE, and open *Windows Explorer* (user *finder* on the MAC). Navigate to the home directory of your jar project. With a *text editor*, open the *.project* file. Find the following line: {code} <name>jar-template</name> {code} and replace *jar-template* with the *short project acronym* that you have previously selected. {color:red}Prefix a *csf-* to the *short project acronym* to denote that this is the jar component of your project.{color} For example: If my *short project acronym* was *att*, then the line would look like the following: {code} <name>csf-att</name> {code} When you are satisfied that everything is correct, save your change and close the .project file. Maximize your IDE. \\ # Right click on the renamed project and select *Configure > Convert to Maven Project* Expand your project and it should look similar to the following: !setupJarTemplate019.jpg! # Right click on the renamed project and select *Team > Share Project...* Select *SVN* as shown below: !setupJarTemplate020.jpg! When satisfied that everything is correct, click *Next*. # Select *Create a new repository location* as shown below: !setupJarTemplate022.jpg! When satisfied that everything is correct, click *Next*. # Enter a desired SVN URL for your project. The SVN repository that you should use is *svn+ssh://svn.mit.edu/es-projects/* followed by the *SVN project identifier* that you had previously selected. |
For example: If my SVN project identifier is academic-att, then the SVN URL would be:
If you have not selected a *SVN project identifier*, please go to [Selecting names for your project | Selecting names for your project#Selection of a SVN project identifier] before continuing. For example: If my *SVN project identifier* is *academic-att*, then the SVN URL would be: {code} svn+ssh://svn.mit.edu/es-projects/academic-att. {code} |
This would mean that my jar project would be created under the *es-projects/academic-att* directory in the SVN repository. |
in the following panel:
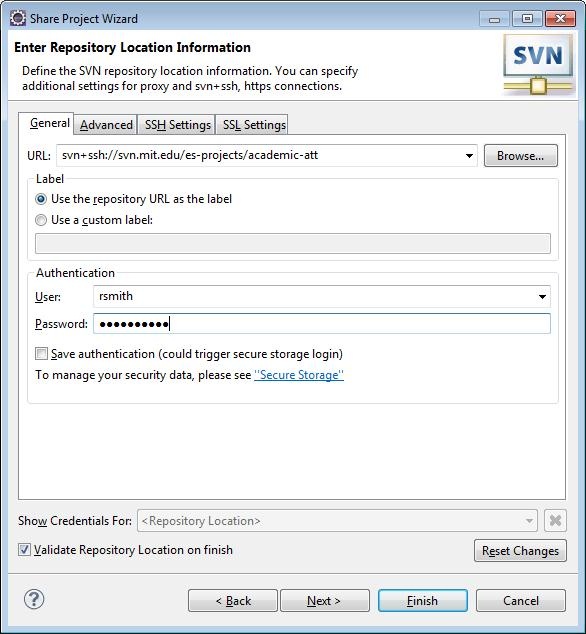
This is shown in the following panel: !setupJarTemplate024.jpg! Don't forget to enter your *User* name and *Password*, |
When satisfied that everything is correct, click *Next*. |
# When the following panel is display notifying you that a new SVN entry will be created: |

When satisfied that everything is correct, click OK.
In the Advanced Mode section, select Use project name.
In the Project Repository Layout section, select Use single project layout.
Check Use Subversion recommended layout ('trunk', 'branches' and 'tags') check box.
The panel should be as illustrated in the following panel:

When satisfied that everything is correct, click Next.
When satisfied that everything is correct, click Finish.
This is the initial SVN check-in (svn commit) for the JAR project:
When satisfied that everything is correct, click OK.
Creating the project jar component using the jar-template is now complete.
!setupJarTemplate026.jpg!
When satisfied that everything is correct, click *OK*.
# Do the following:
In the *Advanced Mode* section, select *Use project name*.
In the *Project Repository Layout* section, select *Use single project layout*.
Check *Use Subversion recommended layout ('trunk', 'branches' and 'tags')* check box.
The panel should be as illustrated in the following panel:
!setupJarTemplate028.jpg!
When satisfied that everything is correct, click *Next*.
# Nothing to do here. This is an information panel similar to the following panel:
!setupJarTemplate030.jpg!
When satisfied that everything is correct, click *Finish*.
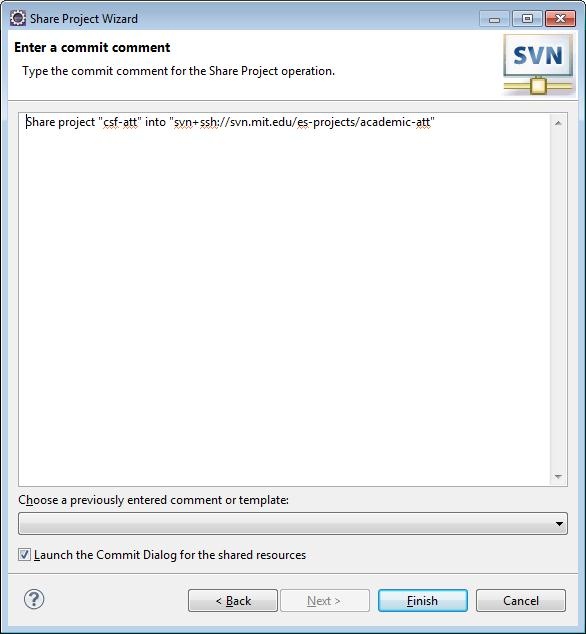
# When a panel similar to the one below is display, enter a comment.
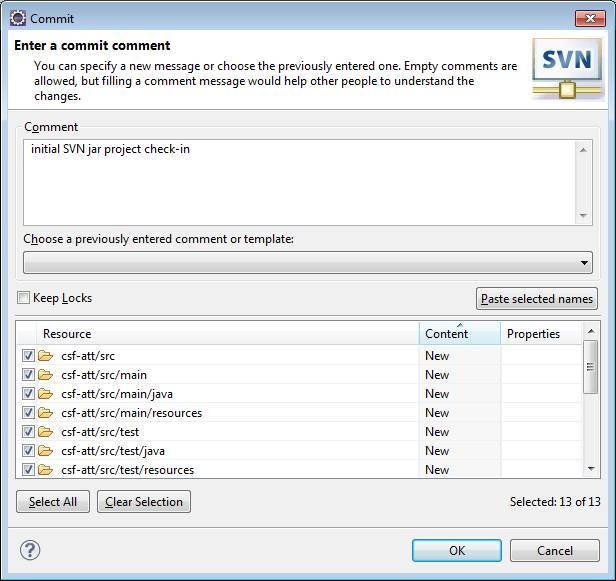
This is the initial SVN check-in (svn commit) for the JAR project:
!setupJarTemplate032.jpg!
When satisfied that everything is correct, click *OK*.
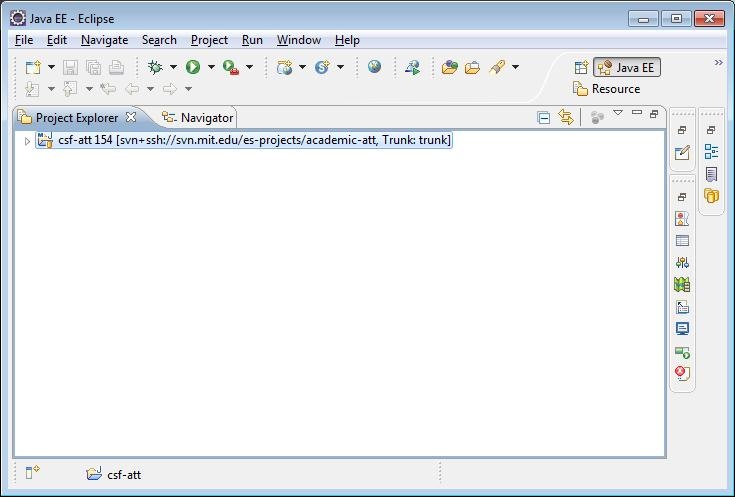
# When the SVN commit has completed, the *Eclipse - Project Explorer View* should look similar to the following.
!setupJarTemplate034.jpg!
h4. {color:green}Creating the project jar component using the jar-template is now complete.{color}
|
| Panel | |||||||||||||||||||||||||||||||||||||||||||||||
|---|---|---|---|---|---|---|---|---|---|---|---|---|---|---|---|---|---|---|---|---|---|---|---|---|---|---|---|---|---|---|---|---|---|---|---|---|---|---|---|---|---|---|---|---|---|---|---|
| |||||||||||||||||||||||||||||||||||||||||||||||
| Panel | |||||||||||||||||||||||||||||||||||||||||||||||
| Anchor | | Customizing the project JAR | Customizing the project JAR | ||||||||||||||||||||||||||||||||||||||||||||
| Code Block |


    <import resource="classpath*:applicationContext-csf-projectName-component-scan.xml" />
    <import resource="classpath*:applicationContext-csf-projectName-config.xml" />
    <import resource="classpath*:applicationContext-csf-projectName-security-spring.xml" />
|
{code} When you have made all the changes, the lines you have changed should look similar to the following: |
{code |
} <import resource="classpath*:applicationContext-csf-att-component-scan.xml" /> <import resource="classpath*:applicationContext-csf-att-config.xml" /> <import resource="classpath*:applicationContext-csf-att-security-spring.xml" /> |
{code} In the above example, *projectName* was replaced with the *short project acronym* *att*. |
When you are satisfied with the changes, *save* and *close* the file. |
# From the *Project Explorer View*, rename each of the following files, substituting your *short project acronym* for *projectName*. |
There are 4 files that have to be renamed. |
{code |
} applicationContext-csf-projectName.xml applicationContext-csf-projectName-component-scan.xml applicationContext-csf-projectName-config.xml applicationContext-csf-projectName-security.xml {code} |
When you have made all the changes, the file names that you have changed should look similar to the following: |
{code |
} applicationContext-csf-att.xml applicationContext-csf-att-component-scan.xml applicationContext-csf-att-config.xml applicationContext-csf-att-security.xml {code} |
In the above example, *projectName* was replaced with the *short project |
acronym* *att*. |
Your *Project Explorer View* should look similar to the following: |

When you are satisfied with the changes, save and close the file.From the Project Explorer View, expand src/test/resources. Open the
!customizeJar006.jpg! When you are satisfied with the changes, *save* and *close* the file. # From the *Project Explorer View*, expand *src/test/resources*. Open the *applicationContext-csf-unit-tests-default.xml* for editing and change the following lines substituting your *short project acronym* for *projectName*. |
There are 2 occurances of *projectName* that have to be changed. |
{code |
} <import resource="classpath*:applicationContext-csf-projectName.xml" /> <import resource="classpath*:applicationContext-csf-projectName-config-test.xml" /> |
{code} When you have made all the changes, the lines you have changed should look similar to the following: |
{code |
} <import resource="classpath*:applicationContext-csf-att.xml" /> <import resource="classpath*:applicationContext-csf-att-config-test.xml" /> {code} |
When you are satisfied with the changes, *save* and *close* the file. |
# From the *Project Explorer View*, expand *src/test/resources |
*. Open the *applicationContext-csf-projectName-config-test.xml* for editing and change the following lines substituting your *short project acronym* for *projectName*. |
There are 2 occurances of *projectName* that have to be changed. |
{code |
} <value>classpath:csf-projectName-test.properties</value> <value>classpath:csf-projectName-test.properties</value> |
{code} When you have made all the changes, the lines you have changed should look similar to the following: |
{code |
} <value>classpath:csf-att-test.properties</value> <value>classpath:csf-att-test.properties</ |
value> {code} |
When you are satisfied with the changes, *save* and *close* the file. |
# From the *Project Explorer View*, rename each of the following files, substituting your *short project acronym* for *projectName*. |
There are 2 files that have to be renamed. |
{code |
} applicationContext-csf-projectName-config-test.xml csf-projectName-test. |
properties {code} |
When you have made all the changes, the file names that you have changed should look similar to the following: |
{code |
} applicationContext-csf-att-config-test.xml csf-att-test.properties |
{code}
# *Commit* all changes to the SVN repository.

h4. {color:green}Customizing the project JAR is now complete.{color}
|
| Panel | ||||||
|---|---|---|---|---|---|---|
Section 3: Customizing the project JAR pom.xml
Customizing the project JAR pom.xml is now complete. |

...