Materials Overview

| Number | Title | Action | Additional Information |
|---|---|---|---|
| 1 | Materials Filter |
| |
2 | Add New Material |
| |
| 3 | Instructor / Student View |
| |
| 4 | Reorder |
| |
| 5 | Import / Export Materials |
| |
| 6 | Compact / Expanded View |
| |
| 7 | Select All Materials |
| |
| 8 | Edit / Delete Material |
| |
| 9 | Filter Materials By Class and/or Sections |
| |
| 10 | Filter By Type |
| |
| 11 | Filter / Group By folder |
|
Adding Materials
- Click
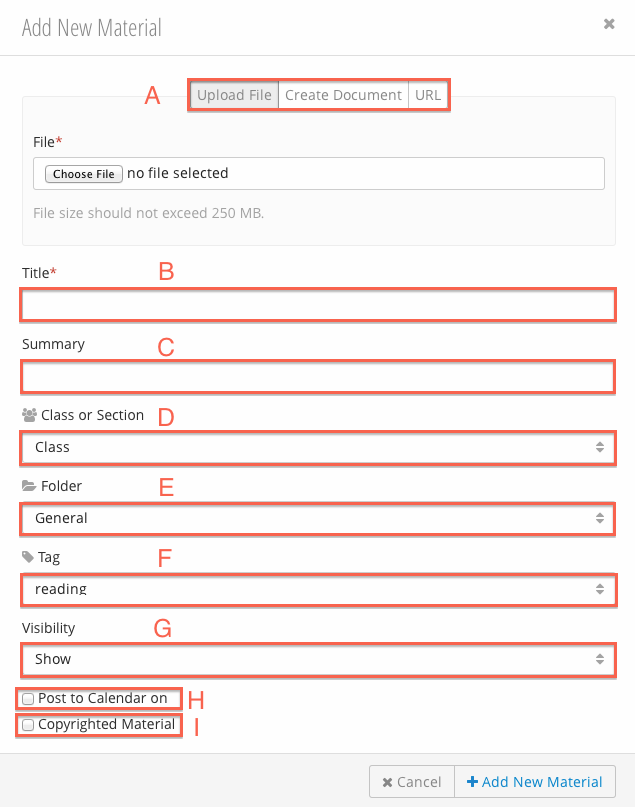
 (2) from the Materials Table. The Add Materials form will display. Required fields are marked with *.
 - Fill in the Add Material form:
- *Material Type - the type of material.
- Upload File - select a file to upload. Please note: there is a file size limit of 250 MB.
- Create Document - enter material content via en editor.
- URL - material will link to an online resource.
- *Title - title of the material.
- Summary - description of the material.
- Class or Section - whether the material should be posted as a class or section material. This option only appears if the course has created one or more Sections.
- Folder - which folder the material will be listed under. See Working with Folders.
- Tag - tags include: syllabus, lecture note, reading, etc. The Materials table can be sorted by tag.
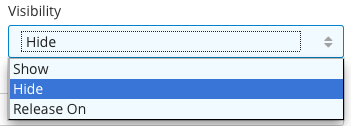
- Visibility- when and if the material will be displayed to students.
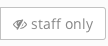
- Show - the material will be displayed to students.
- Hide - the material will be displayed to staff only.
- Release On - the material will be hidden to students until the specified date.
- Post to Calendar On - choose the date the material will be listed in the calendar.
- Copyrighted Material - checking the copyright checkbox will mark the material as Restricted Use. When the material is accessed, the user will be prompted with a copyright disclaimer. More information about the copyright policy can be found here.
- Work Title - the title of the copyrighted material.
- Author - the author of the copyrighted material.
- Citation - the citation for the copyrighted material.
- *Material Type - the type of material.
- Click Add Material.
Adding a Staff Only Material
- Click (2) from the Materials Table. The Add Materials form will be displayed.
- Fill in the form, selecting Hide from the Visibility (F) dropdown.
- Click Add Material. Staff only materials will be marked as Staff Only on the Materials Table.
Editing and Deleting Materials

Editing a Material
- Click the
 (7) icon for the material you intend to edit.
 - The Add Material form will be displayed. See Adding Materials.
- Make the desired changes.
- Click the checkmark to save your changes.
Deleting a Material
- Click
 (7) icon for the material you intend to delete.
 - A confirmation message will be displayed. Click Delete to remove the material.
Bulk Mark Materials Visible or Staff Only
You can mark multiple materials as Staff Only or Visible (depending on their current visibility) by checking the material(s) corresponding checkbox. You can select all materials by checking the Select All Materials (6) checkbox.
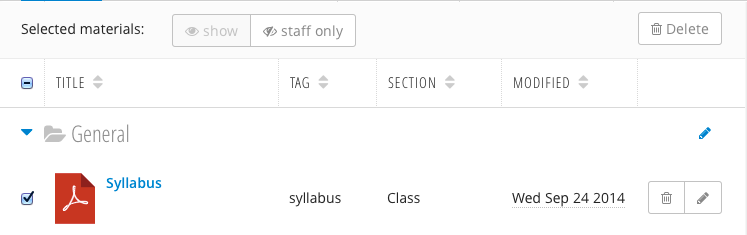
Once one or more materials are selected, the following options will appear:
 : Mark the selected material(s) as visible. This option will be greyed out if the selected material(s) are not Staff Only.
 : Mark the selected material(s) as Staff Only. This option will be greyed out if the selected material(s) are Visible.
 : Delete the selected material(s).
Reordering Materials
For information on reordering folders, see Reordering Folders.
Reordering Materials in a Folder
- Click
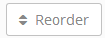 (3). The reorder page will display.
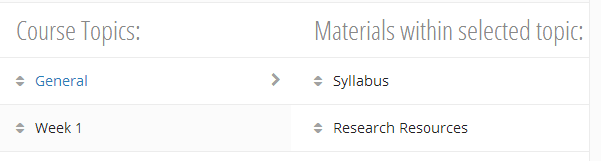
- Drag and drop materials to reorder them.
- Click Done.
Changing a Material's Folder
- Click the (6) icon. The Materials Form will display.
- In the Folder dropdown, select the Folder you wish to move the material to.
- Click the checkmark to save your changes.
Importing and Exporting Materials
Materials and homework from both Stellar and Learning Modules can be imported into a your current Learning Modules site. There are two ways to import from a previous course. The appropriate method is based on which term you are importing from.
For instructions on importing from 'Classic' Stellar sites from more than 2 years ago see: alternate import instructions.
Importing from any Learning Modules course or from a 'Classic' Stellar site from the last 2 years
Steps to import:
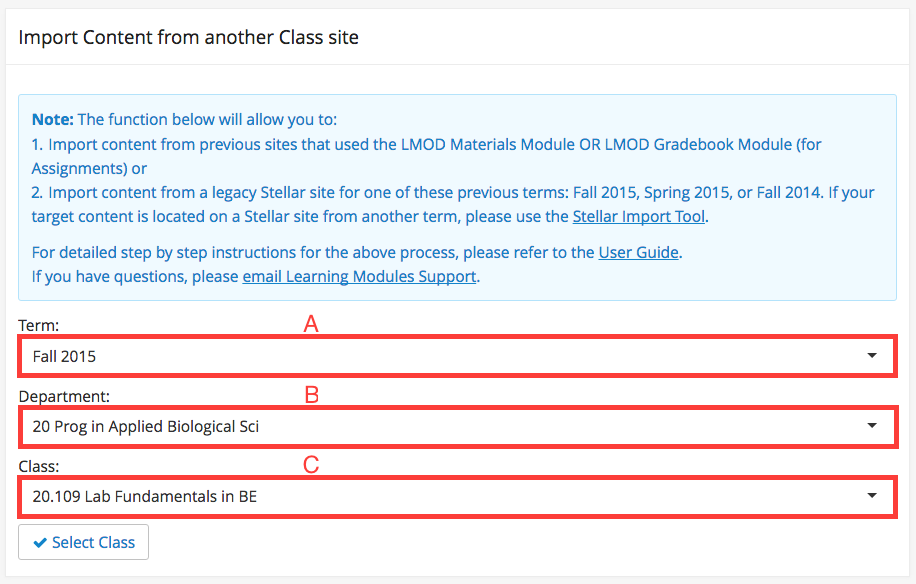
- Click
 (5). The importer tool will display.
 - Select the desired options from the three drop downs:
- Term - The term of the course you wish to import from. By default, this will display the previous term the current course was offered.
- Department - The department of the course you wish to import from. By default this will display the department of the current course.
- Class - The course number. By default this will display the current course number (if it existed in the previous term).
- Once you have selected the desired course, click Select Class.
- A list of importable materials and homework assignments will be displayed.
- Select a destination for imported materials.
- Click

Importing from a 'Classic' Stellar site from more than 2 years ago
Click Here to watch a video on how to import from Stellar.
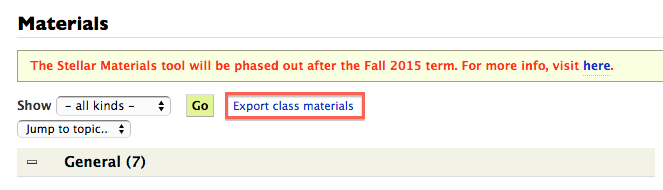
The first step to importing from Stellar is to export the class materials from the Stellar course you wish to import from:
- Navigate to the Stellar site.
- Click on the Stellar Materials link.
- Click Export class materials link.
Once you have exported the ZIP to your local machine, return to the Materials module and:
- Click
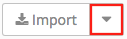 (5).
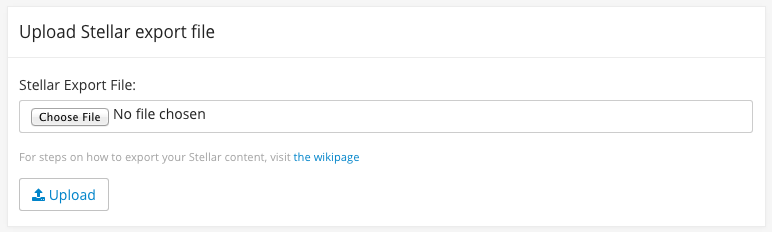
(5). - Select Import Stellar Content ZIP from the dropdown. The Stellar Importer will be displayed.
- Click Choose File and select the ZIP file you exported from Stellar.
- Click Upload
Importing From LMOD (previously exported ZIP file)
- click (4).
- Select Import Materials ZIP and choose an exported zip file to upload.
- Confirm.
Exporting Materials
To export all materials, click 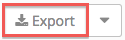 (4).
(4).
Filtering Materials
Filtering by Class and Section
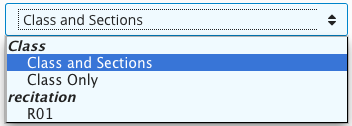
The Class And Sections Filter (8) filters materials by
Filtering by Type
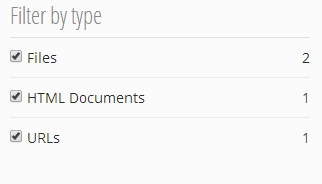
The Filter By Type (7) section of the sidebar filters the Materials table. The Filter By Type filter will only display the types of existing materials. By default, all types are displayed. Unchecking a checkbox will filter the corresponding material type from the table.
Filtering by Folder and tag
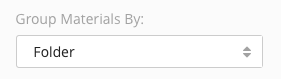
You can group materials by:
- Folder - Default view. Materials are listed by Folders.
- Tag - Materials are listed by tag. Tags are assigned during Material creation. Tags include: syllabus, reading. research, lecture note, resource, etc.
- No Grouping - Materials are not grouped.
You can filter groups by Folder. All Folders are displayed by default. Selecting a Folder from the Group Materials By (8) dropdown will only display materials in that Folder.
Filtering by Material

You can filter the Materials Table by entering text into the Material Filter (1). The numeral beside the Material Filter indicates how many materials are currently displayed in the table.