To get started with STK, we will first focus on what you'll see when starting up the application, and navigating all the panels in the interface.
Getting Started
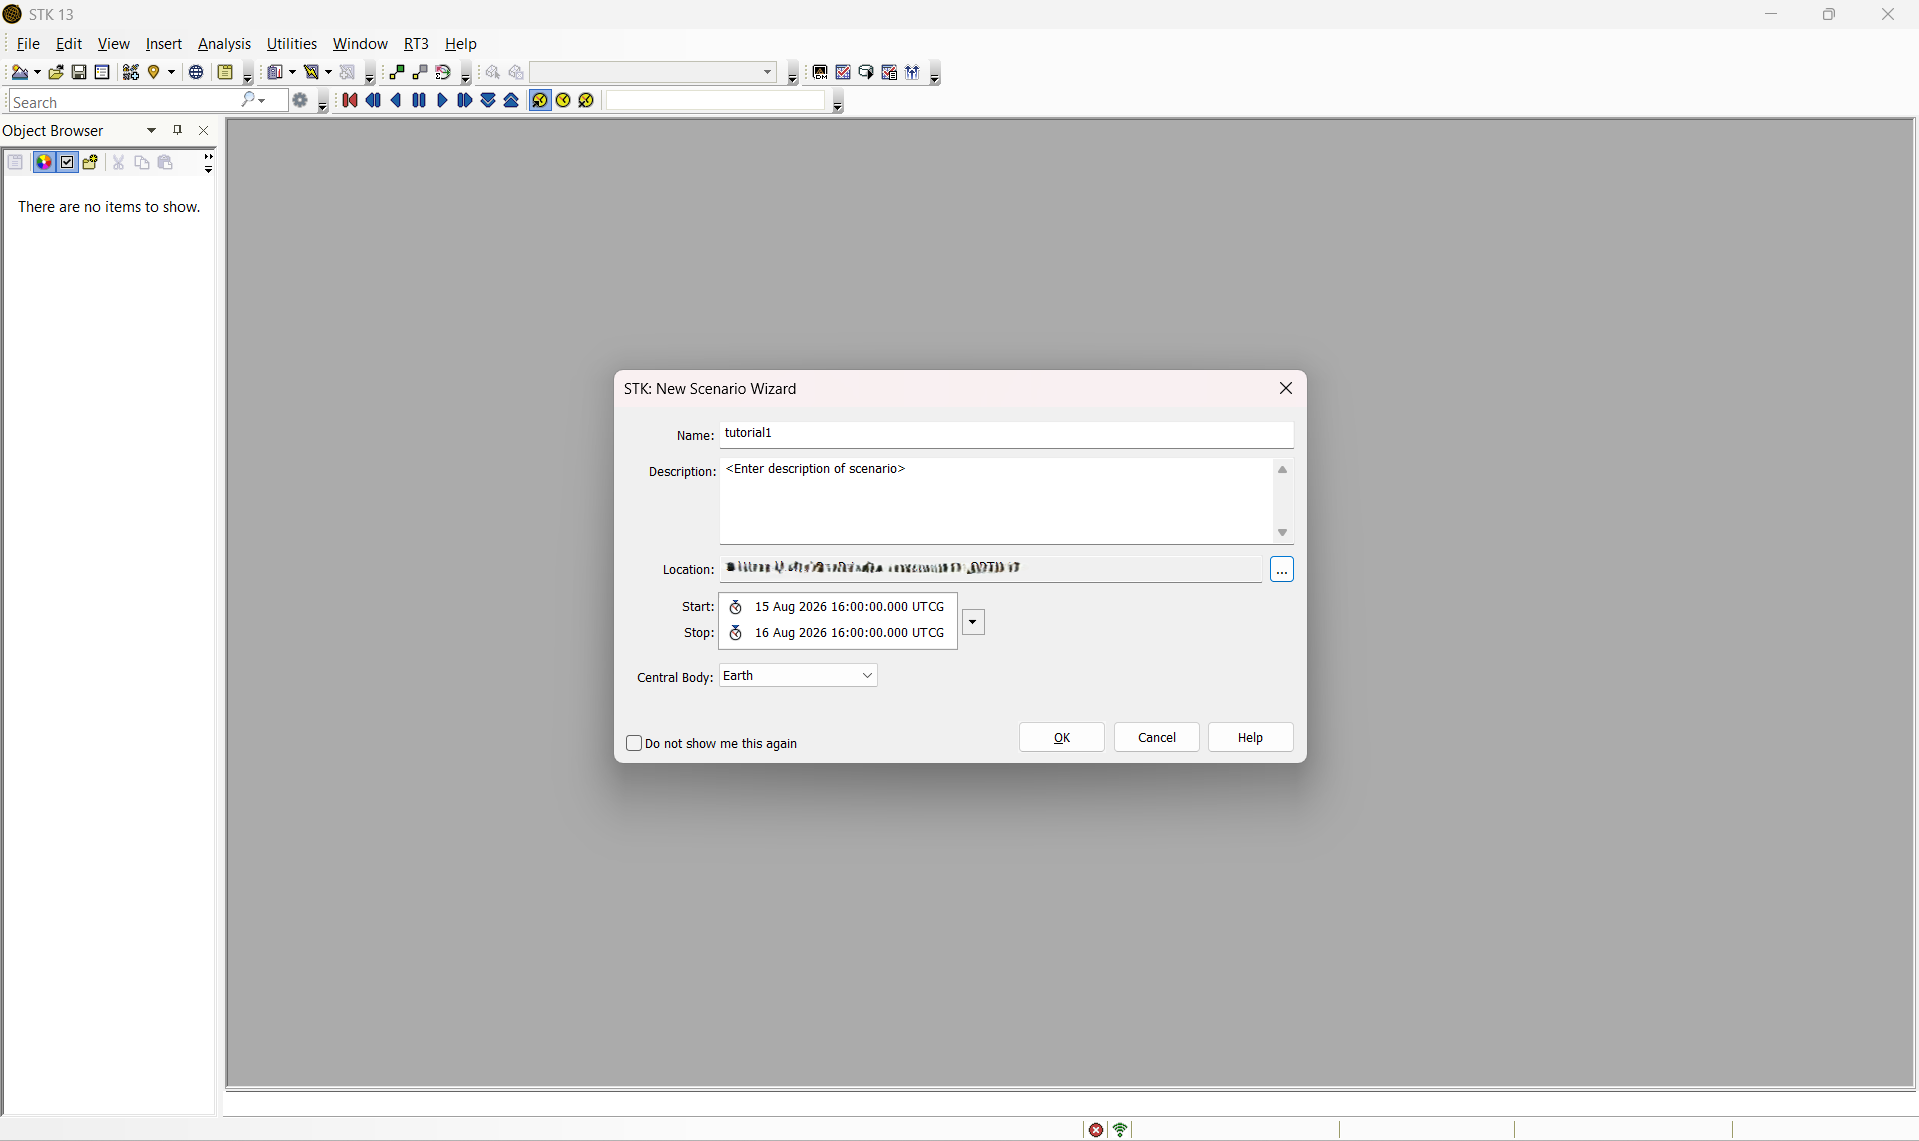
When you first open up STK, you'll see the following window (after you click "Create New Scenario"):
(click to enlarge)
The window in the center of your screen pops up and allows you to create a new scenario. Think of a scenario as a project file. You're analyzing some situation or trying to simulate some scenario, which would live within a single new folder that STK creates. You can name it whatever you want, but of course, you should make the name something relevant to your scenario. You can change where this folder lives, although I highly recommend that you just leave it in the default location.
Moving down along that window, you can see that you can change the start and stop time of the scenario. All this does is change the timeframe within which the scenario will be simulated. This is not particularly relevant right now, but if you import historical data from a satellite or really anything from the past, this becomes very important, as this could mess with the location of satellites, aircraft, planets, and more.
Finally, you can change the central body that you focus on. For the purposes of this and the next few tutorials, we will keep our central body as Earth to be our "home" planet or celestial body. Click "OK" to proceed!
Your Home Screen
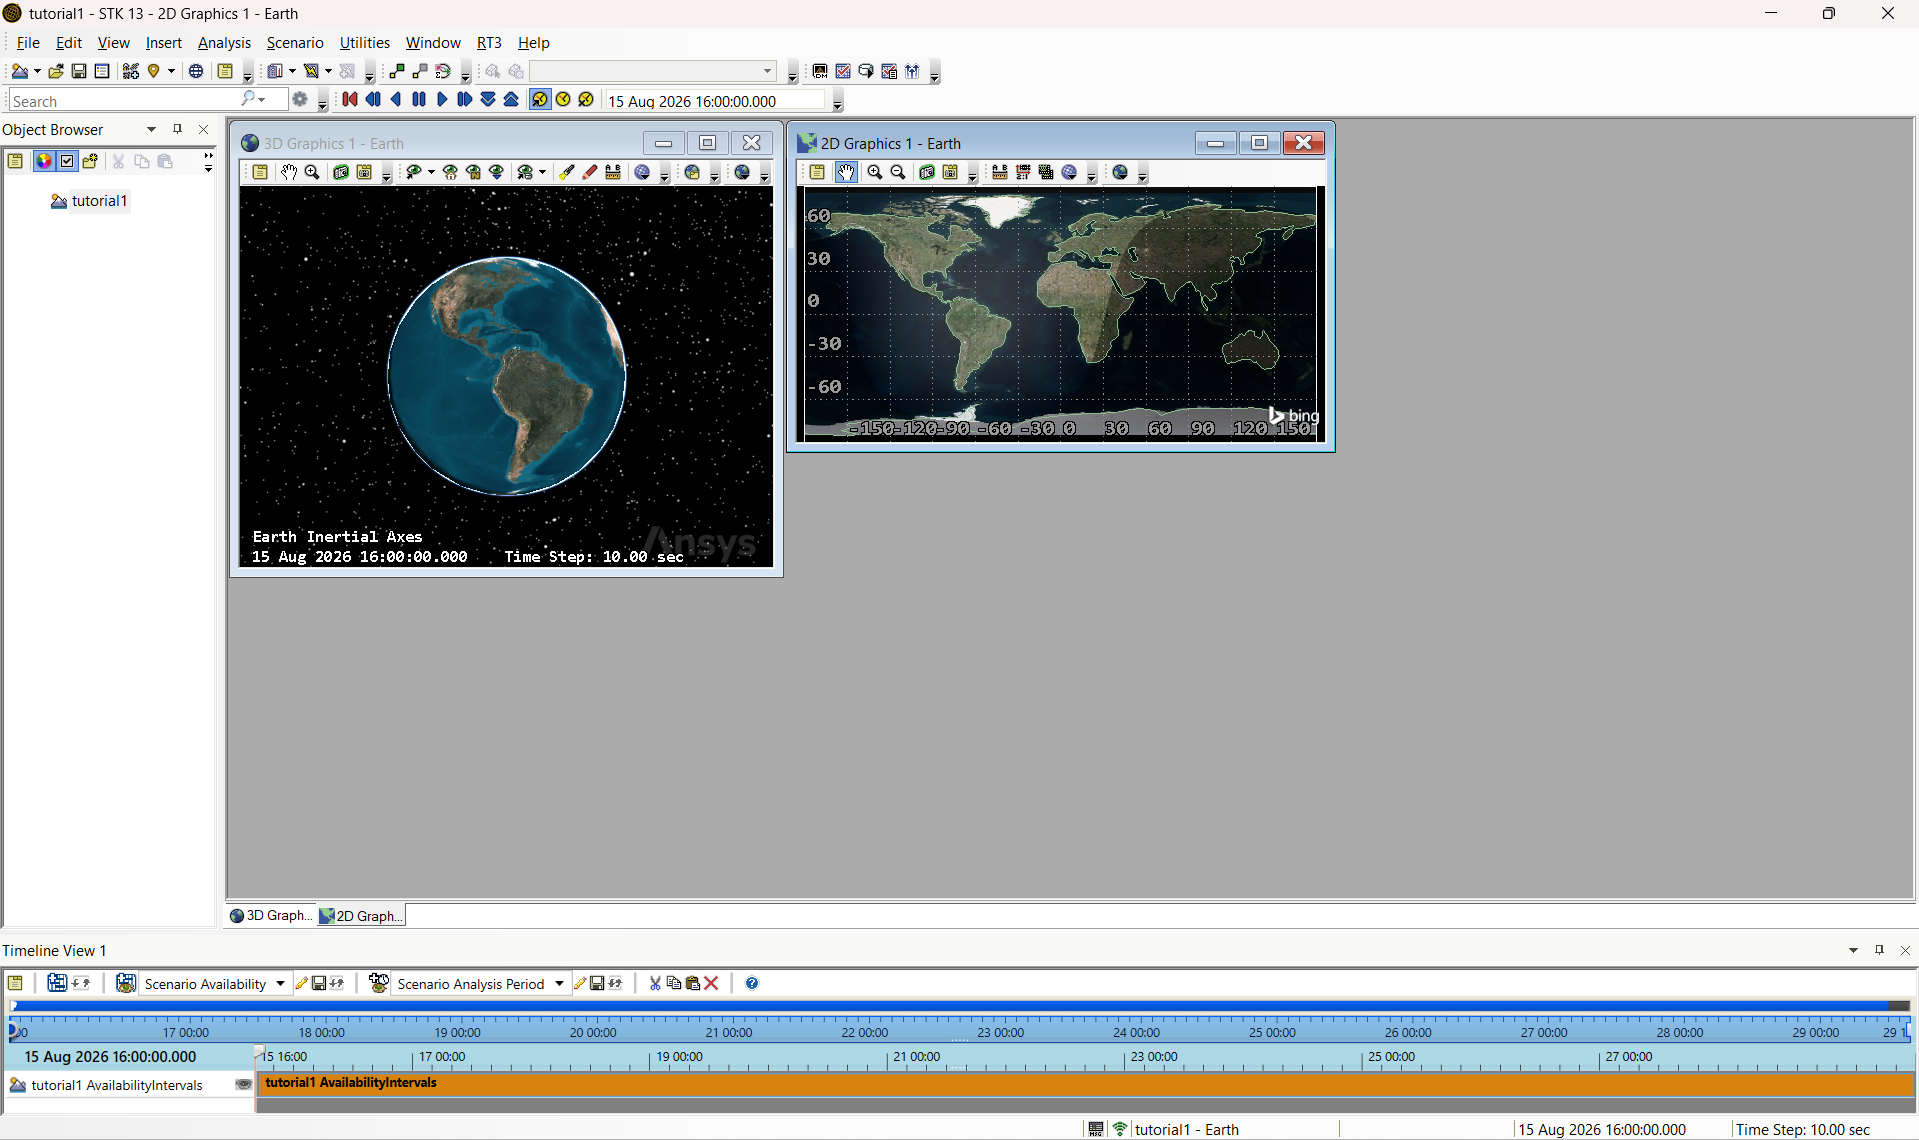
You'll see a pop-up that invites you to create a new object. We'll get to that, so for now just close that window. Let's look at what's behind that. What you (should) see on your screen is shown below:
(click to enlarge)
This is where everything that you'll work with in STK lives. You have your Object Browser, your Timeline View, your 2D and 3D Graphics Windows, and your Animation Toolbar. We'll go through them one by one, starting with the Object Browser:
The Object Browser
(click to enlarge)
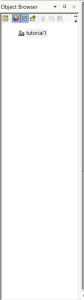
Your object browser is where everything that you insert into your scenario lives. As of right now, the only thing you should notice in your object browser is your scenario, which you named earlier. Your scenario contains all the objects (hence object browser) that interact and will be simulated. Some objects, as you'll come to learn, can be attached to other objects. Those objects will be indented under their primary objects, which will all fall under your scenario "object". You will also be able to group objects into a constellation, and in that case, all the objects in that constellation will be indented under the constellation's name. This answers "what": what assets are currently in your scenario, what objects belong to what parent systems, and what parameters you can modify to build your simulation. A good rule of thumb in STK is that anything you can right-click on is something that you can edit the properties of. Look!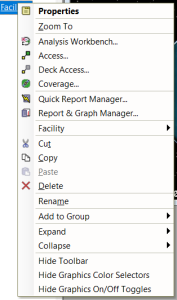
Timeline View

In the timeline view, you can see exactly where you are in your simulation with the display of a live chart of every event, pass, and access window across your scenario. As your simulation runs, a line moves across the timeline so you can see how different object interactions overlap. It’s where you go to answer "when": when a satellite is over a ground station, when an object is in sunlight versus shadow, or when a sensor has line-of-sight to a target.
(2 & 3)D Graphics Windows
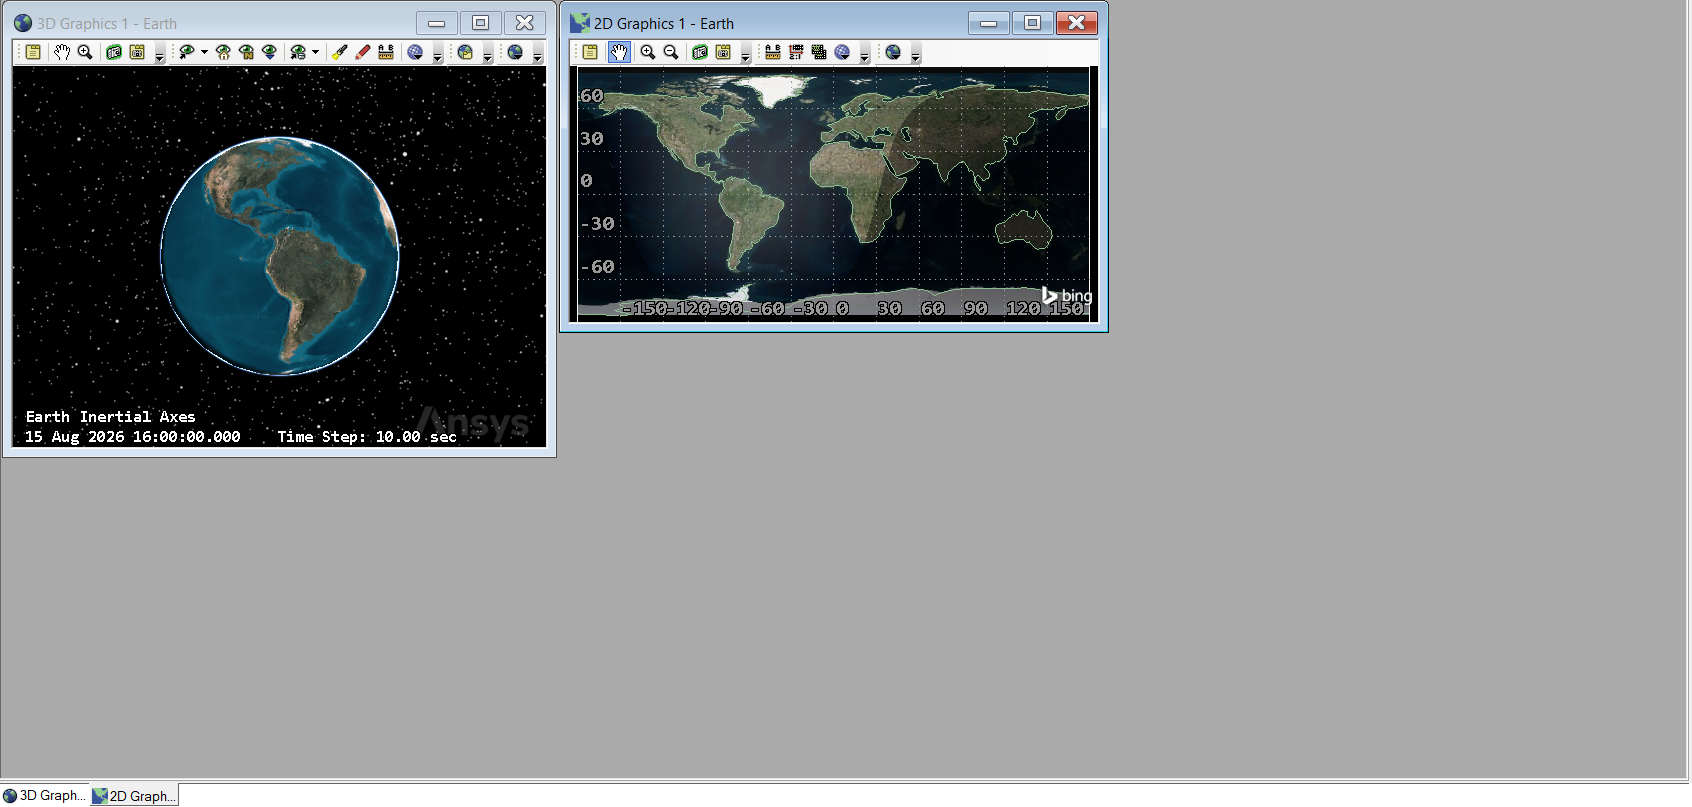
The 2D and 3D Graphics Windows are where your simulation comes to life visually, taking the data in your scenario and mapping it into physical space. While the 2D window gives you a flattened, global map view that’s great for tracking ground tracks and coverage footprints, the 3D window lets you orbit, zoom, and inspect your assets from any angle in real time. Together, they answer "where": where your satellite is pointing, where it is relative to the Earth, and what its exact visual line-of-sight looks like at any given second. The object seen in the 3D and 2D Graphics windows by default is your central body, though you can change what you see there by clicking the sphere with the grid layout in the top bar of each window.
3D Graphics Window
This is the one with the Earth in 3D, as a globe. If you're working with anything that'll fly in space, this is the view that you want to focus on the most. You can orient your view in a couple of different ways: home view (which is a straight shot of the Americas), top (looking down on the North Pole), or any specific angles that you can save in your stored views. You can enable the flashlight if the body you are looking at has a "dark" side and you want to be able to see it. Click on the pencil to draw on the body that you're looking at, or click on the ruler if you want to measure a distance along a celestial body that is curved, like the Earth.
To navigate the window, left-click and drag to rotate about the central body. Right-click and drag to zoom in and out centered at the central body (Earth). Hold down the shift key, left-click, and drag to pan your window // move laterally.
2D Graphics Window
This is the one that looks like a map of the Earth. This view is much simpler, and will allow you to view things like the range of an antenna on an object like a satellite or aircraft as it moves around the Earth. You can measure along this view as well, adjust the aspect ratio, or even change the celestial body on the map that you're looking at.
To navigate the window, left-click and drag to move left and right along the map.
Animation Toolbar

The Animation Toolbar is your control center for moving through time in your simulation, working like a media player for your entire STK scenario. It gives you the power to play, pause, rewind, or jump to specific times, as well as speed up or slow down the simulation clock. It’s where you go to answer "how fast": how quickly your scenario unfolds and at what pace you want to observe your orbit dynamics and access passes in real time. See the STK Dictionary for what each of the buttons do.
Inserting a New Object
If you look to the very top of your screen, you'll see the word "Insert". Click on that, because we're going to introduce a new object into our scenario! For this tutorial (and the next), we'll be working with the "Facility" object. A facility may represent a ground station, mission control, launch site, or tracking facility. Note: a facility and place are not the same thing; a "Place" object is simply a geographic marker, while a "Facility" object is assumed to be more functional.
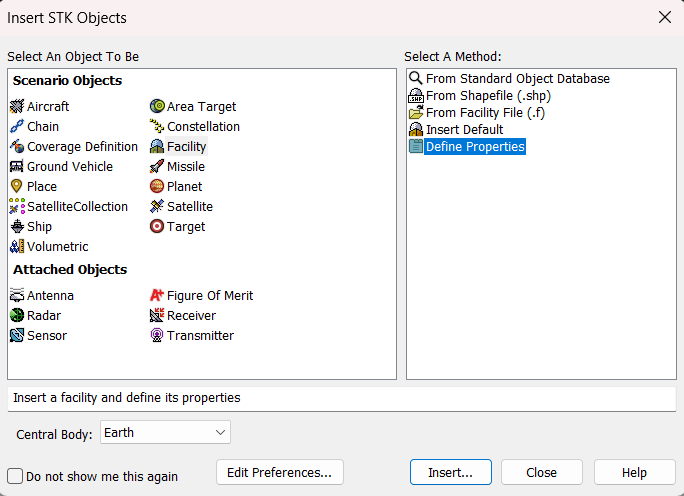
On the left hand side, you can see the many objects that you have the option to insert into your scenario. Along the bottom of this left hand side, you can see the category labelled "Attached Objects". These are the objects that must be attached to one of the objects in the category above. On the right hand side, you can see that there are many ways to define each of these objects. The Facility object is one of the simpler objects however, so you can insert one from STK's database, insert a default facility, insert one from a file, or just define properties of a specific one. We will be placing this facility at MIT, so let's select "Define Properties". We will keep our central body as Earth (since MIT is on Earth), and click "Insert".
After you insert the facility, you'll see this large menu of properties pop up. There are a ton of properties for graphics in both windows, constraints applied to the facility (like line of sight or elevation angle), and RF + Laser properties. Most of the time, the properties you will need to make use of will sit in the more basic categories. Under the "Basic" tab, enter the "Position" tab. To ensure that the facility actually sits at MIT, we're going to adjust the latitude and longitude values to what I have in the screenshot below:
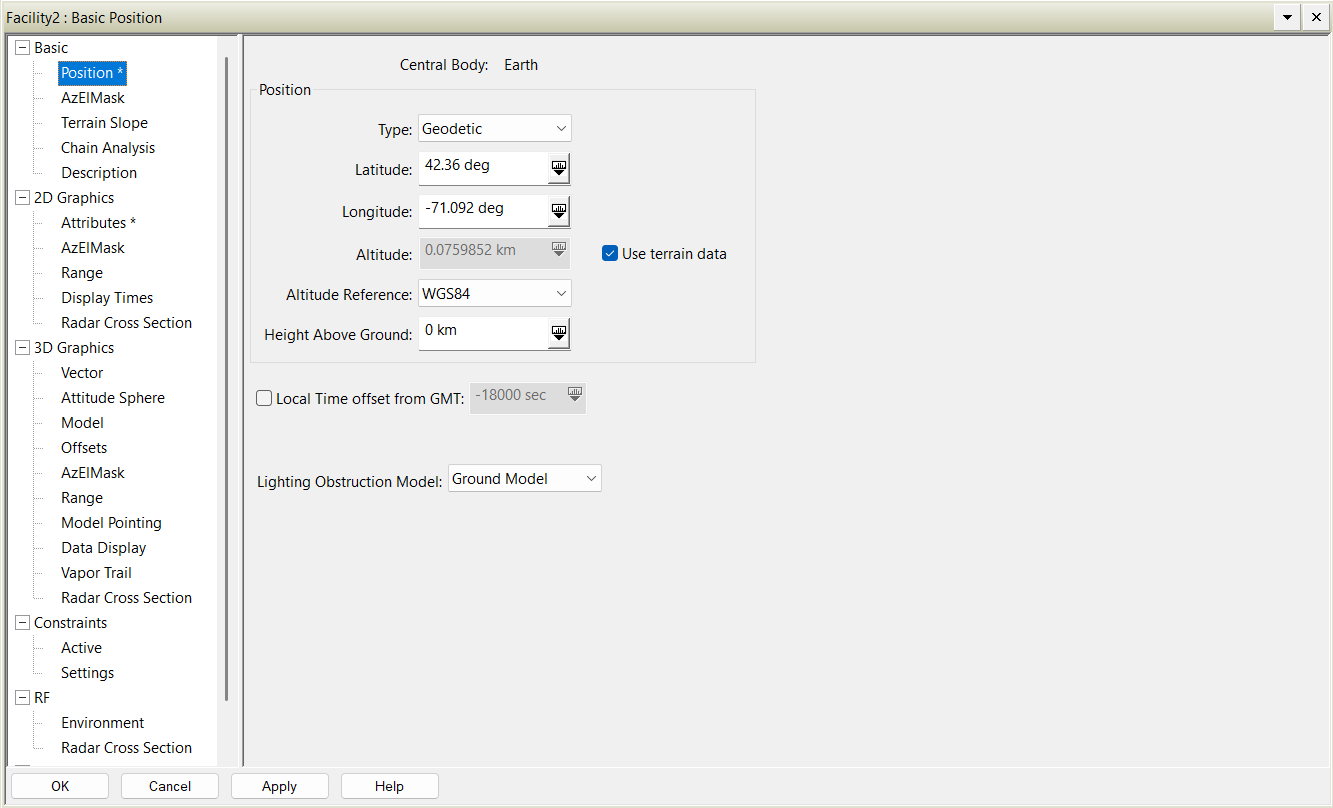
We will keep our "type" to Geodetic (which just means that we acknowledge and consider the fact that the Earth is not a perfect sphere, but rather squished a bit on the sides) and everything else can stay the same for now. If you want to change how our facility will look in our graphics windows, feel free to go and browse the 2D Graphics and 3D Graphics tabs, and change the color and icon for our new facility.
If you've done everything right up until this point, this is what your workspace (graphics + OB (object browser)) should look like: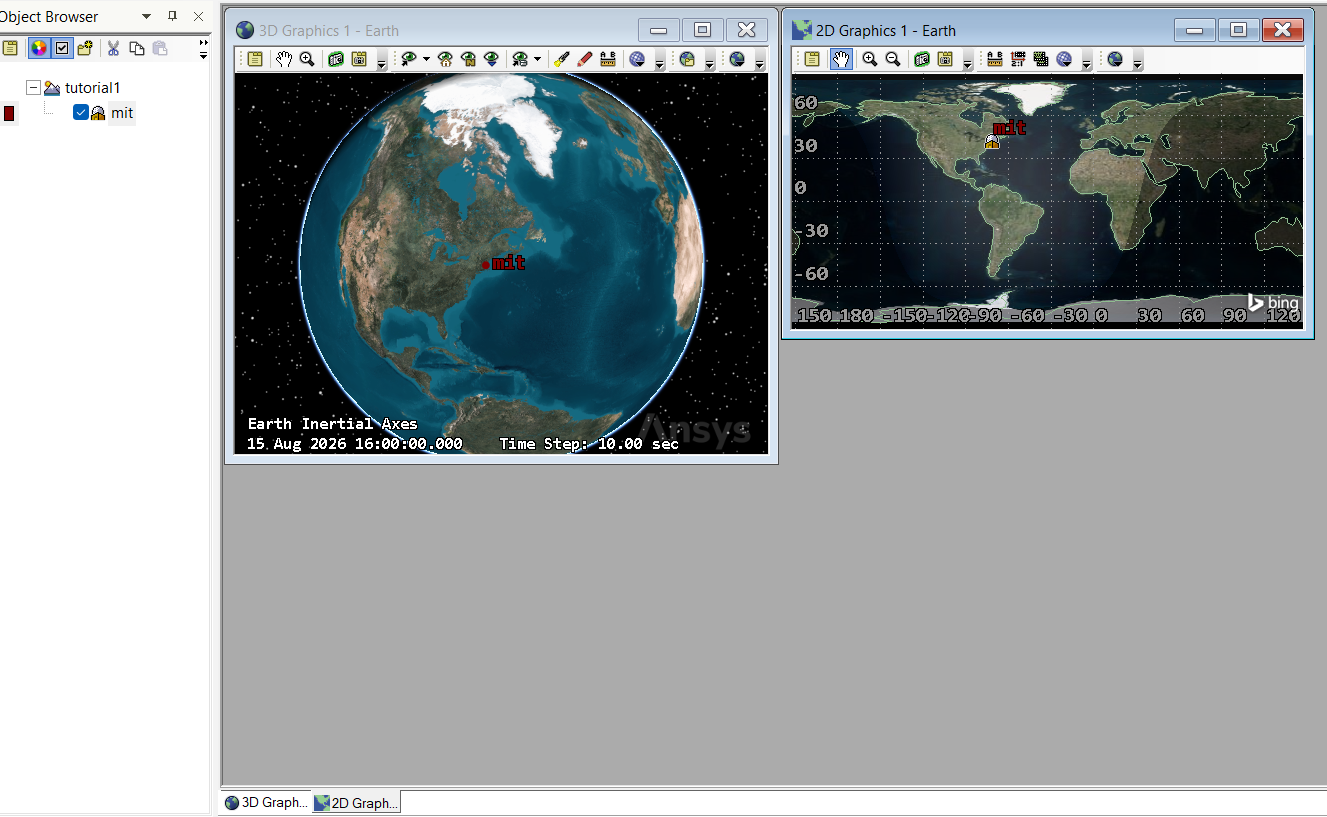
Note that I did make MIT that burgundy, and kept the facility icon the same. Hopefully you managed to get to a similar point and got a better grasp of the layout of STK! The best way to learn is just to hover and click on everything. Explore!