What is a "layup jig?"
A jig is a device that holds a piece of work and guides the tools operating on it. A composite layup is the process of making a composite part (fiberglass, carbon fiber, etc.) by laying pieces of fiber sheet, similar to paper mache (or "Papier-mâché" if you wanna get fancy)
So this article describes the steps needed to make a jig that can be used to overwrap body tubes, and potentially to be used as a "spit" on which a nose cone can be spun while ablative coating is applied and cured.
This article is a work in progress, but the photos and basic steps included below should get one off to a good start. The key features of this layup jig is:
- It can be easily stowed
- It has half-circlular divets on top of which a pole can be rested.
- It can be built inexpensively (using plywood) and limited tools
- It is adjustable, and able to support a 5' or 6' long mandrel (a mandrel is a tube that is used to make body tube layups. In the past we used an aluminum mandrel, wrapped that with Mylar and other materials, and did a layup over that to remove the tube. If you're making your own tubes, make sure your mandrel is tapered or it will be extremely difficult to remove your tubes. We have an article with more details on this topic).
Layup Jig Design
RE: Diane Li, Paige Vincent
Collapsible, adjustable layup jig
function:
support equipment for body tube layups
requirements:
supports 5’ or 6’ long mandrel
mandrel must be level and free to rotate
collapses for storage
Diagrams and Photos
planning:
final design:

construction:

Software: N/A
Hardware and Manufacturing
materials:
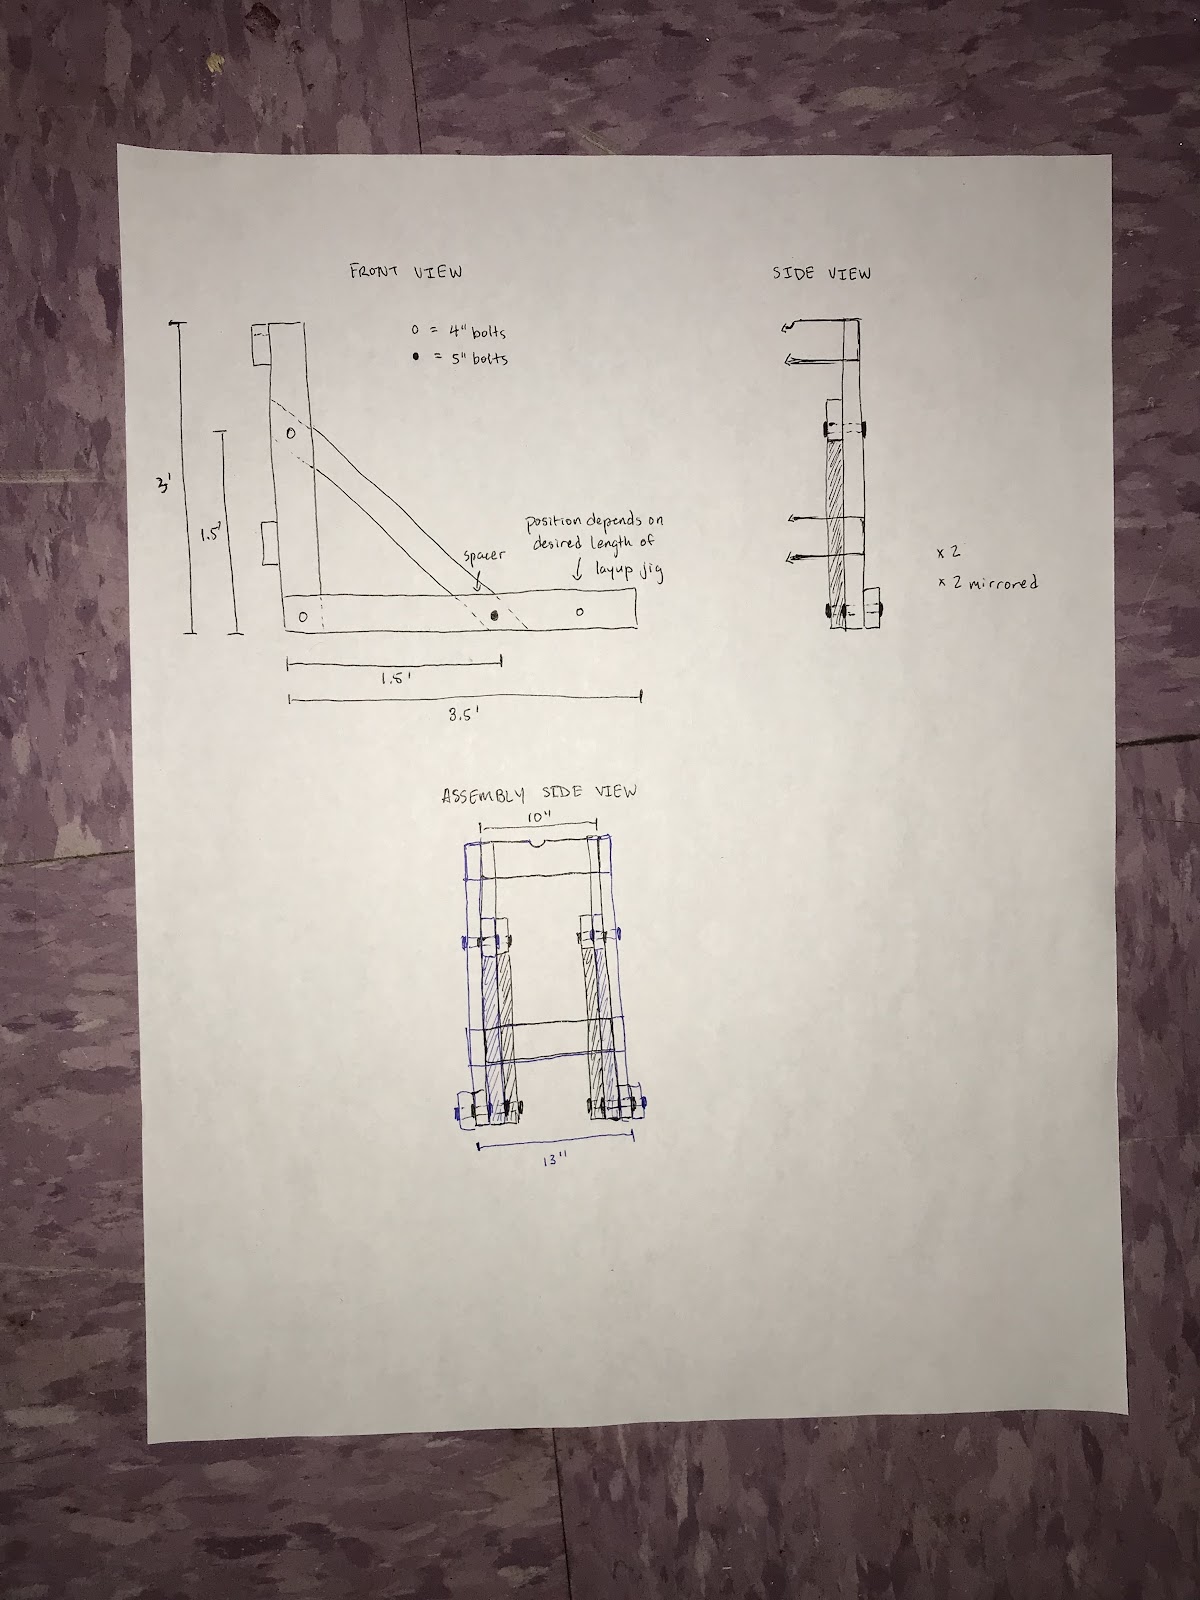
2”x4”x3’ (8)
2”x4”x3.5’ (4)
2”x4”x10” (2)
2”x4”x13” (2)
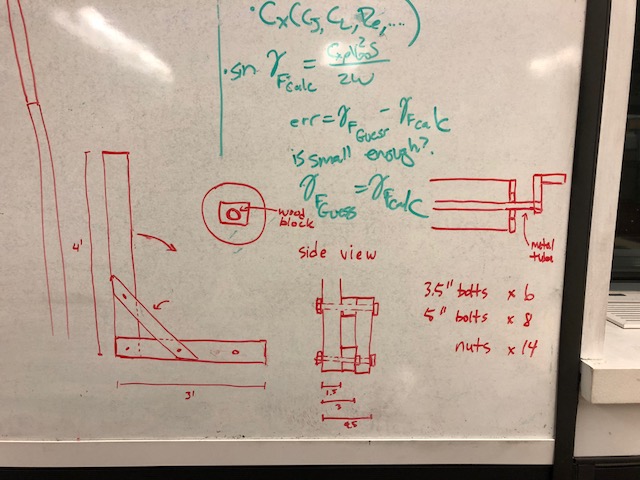
4” long bolts (10)
5” long bolts (5)
nuts (15) and washers (15)
wood screws (24)
6’ long metal pole
mandrel
tools:
tape measure
sharpie
clamp
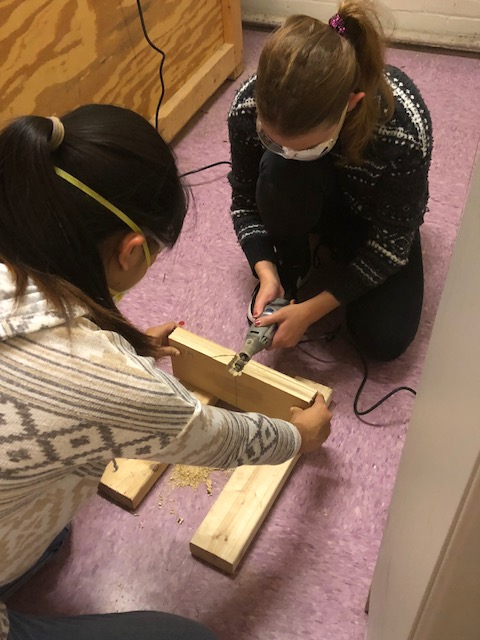
power drill
dremel
chop saw
instructions (refer to final design and construction images):
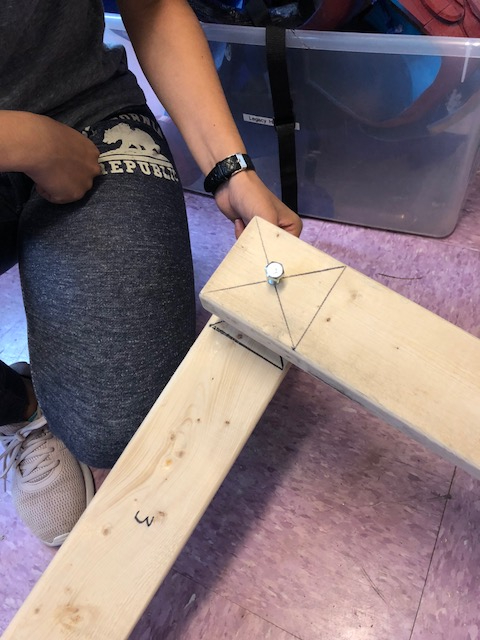
use chop saw to cut four of the 3’ long 2”x4”s into angle supports
save the longer ends as spacers
fix a spacer to one end of each angle support with two wood screws
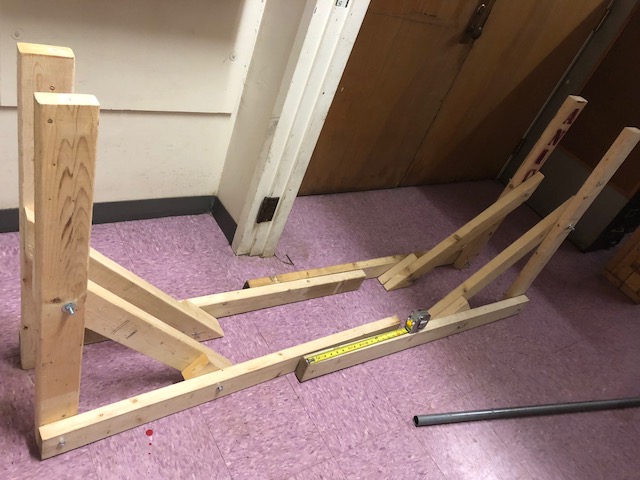
assemble each leg of the jig with a 2”x4”x3.5’ on the ground, a 2”x4”x3’ perpendicular to it, and an angle support connecting the two
use band saw or drill to create semi-circle cutouts at the top edge of one of the 10” long 2”x4”s and one of the 13” long 2”x4”s, smooth with dremel
use wood screws to attach the two interior legs with the 10” long 2”x4”s and the two exterior legs with the 13” long 2”x4”s, making sure to align the semi-circle cutouts at the top of the jig
align the interior and exterior legs, adjust the jig length and drill holes accordingly
Tips and Tricks
use drill bits that are 1/16” larger than your bolts so that the bolts slide easily in and out of the holes
clamp two beams together and drill through both at once to avoid alignment issues
find scrap wood hanging around edgerton