...
- Make a template: Make cutout by laying piece of fiberglass in mold and marking the edges, allowing for a 1" tab that decreases to around 0.5" as you get to the tip
- Be sure to mark where the tab is on the cutout so you know how to orient the ply during the layup.
- Using spray glue (3M Super77), lightly spray a piece of wax or parchment paper and, with the help of another person, lay down the ply.
- Smooth out any bubbles/wrinkles (start over if it isn't completely smooth)
- Cut using sharp scissors or pizza-roller type cutting tool on a plastic mat
Layup
- Clear surface and prepare supplies. Cover surface with Mylar because you're going to pour epoxy on it
- Scale for weighing epoxy
- Squeegees
- Shop towels
- Scissors
- Rollers
- Mix cabosil + epoxy and apply to mold (thick on edges)
- Use System 3000 epoxy
- Mix enough cabosil until the texture is like melted butter
- Using a roller, apply to the mold (apply thick coating on the edges in particular)
- Lay down first ply and, using a roller, roll the surface from end to end so that the cabosil + epoxy layer from underneath soaks in
- Pour a generous amount of epoxy in the middle of the table and roll the rollers in it, and apply to the first layer until thoroughly soaked
- Cut any stray fibers in the meantime, but don't wipe away the epoxy on the edges/top of the mold with acetone or you'll remove the PVA film.
- Place a second dry layer, offsetting by around 0.1" as shown below. This is so that when the two halves are put together, there isn't as large of a seam.
- Tab at least 1" at base, shorter at tip
- Attach halves of mold carefully, making sure tab doesn't get stuck
Left of image: seam design for Nose Cone #1. Right of image: new, improved seam design for flight nose cone. Instead of the seam being 20 layers thick (left), it is now only 10 layers thick. While it may be difficult to get the layers perfectly overlapped in practice, the seam should still be a lot less thick. This is good because you won't have to sand the inside of the nose cone as much to fit the coupler inside.
Vacuum Bagging and Mold Release
...
- Sand outside
- Sand inside (seam)
- Plane ends
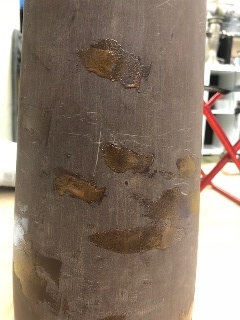
- Fill low spots with ablative + epoxy mixture
- Sand with 60 grit to roughen up because epoxy doesn't stick well to itself. You might have to use a file to get to smaller low spots
- Wipe down surface of nose cone with acetone
- Mix 10g resin + 1.8g hardener (System 3000) + arbitrary amount of phenolic microballoons (just eyeball it until it's about the same consistency as the mixture you made for the ablative coating)
- Carefully apply mixture to low spots, scraping off excess
- Let cure for at least 24 hours and sand
Holes for Coupler
Finishing
...
- Don't coat the mold multiple times with epoxy - just once, let soak and WIPE, then cure and sand
- Protect edges with aluminum or something rigid and straight to prevent them from getting rounded
- Do not wipe mold with acetone once PVA film has been applied or it will come off

