...
Connect your device as outlined in the appropriate part of the connecting devices section.
Click on the FTK Imager icon on the Windows desktop
In FTK Imager, go to File > Add disk image.
Select the source of your image (in this case, physical) and then click next.
Select the drive from the drop down menu you want to image and click Finish.
A new “Create Image” box will pop up. Click the Add... button under Image Destination(s)
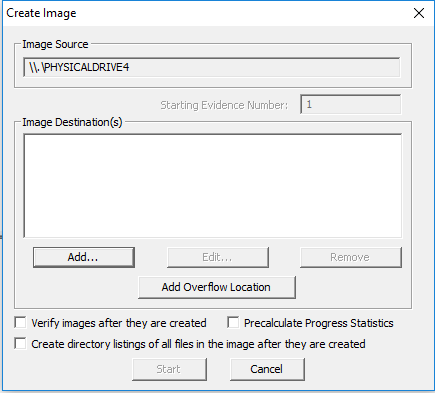
A box will pop up asking for the destination image type. Select E01 and click next.
The next box will be “Evidence Item Information”.
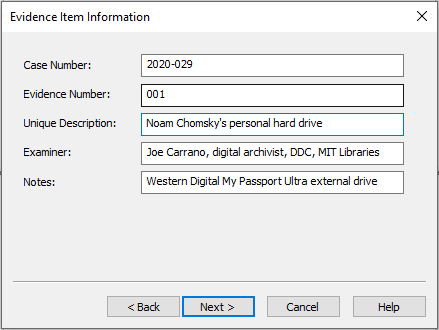
- In the case number field enter the accession number of the collection the item came from.
- In the evidence number field enter the item number (in other words, the number appended on the end of the accession number and labeled on the item, for example 001).
- For the description, transcribe a label or supply a description of the content of the media if known.
- In the examiner field, enter your name, role, and DDC, MIT Libraries at the end.
- In the note field, describe the type of media being imaged or other relevant information.
- Click next.
- A new “select image destination” box will pop up.
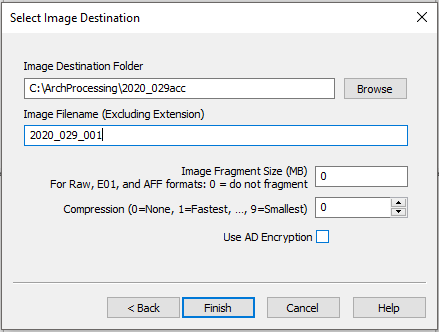
- For Image destination folder, type in or use browse to select the accession directory.
- For Image filename use the name that is on the item’s label (in other words, the accession number appended with the item number).
- Set Image Fragment Size and Compression to 0 and click Finish when ready.
- Clicking Finish will return you to the “Create Image” box.
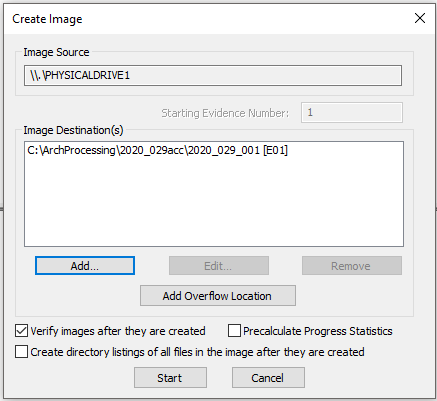
- Select the check box to “Verify images after they are created.”
- Click Start when ready.
- A new box will pop up that will allow you to monitor the progress of imaging (can take hours, depending on the size of the storage device).
- If imaging fails or has too many errors, try again or try using Kryoflux (in the case of 3.5” disks). Consult with the digital archivist if you have already tried using Guymager.
- Once the imaging is complete, proceed to the next item in the collection or proceed to the disk processor section. (link).


