Guymager is an all purpose software tool with a user interface for creating disk images. In general, it is your first choice for imaging hard drives, memory cards, Zip disks, 3.5” floppy disks via USB, and data on optical discs.
- Connect your device as outlined in the appropriate part of the Connecting Devices section.
- Along the navigation bar at the top of the screen, go to the "Applications" drop down menu.
- Go to the “Imaging and Recovery” folder and click on the Guymager icon.
- The program will then open. You may be prompted to enter the BitCurator password (bcadmin)
- Right click on the device you want to image, and select “acquire image"
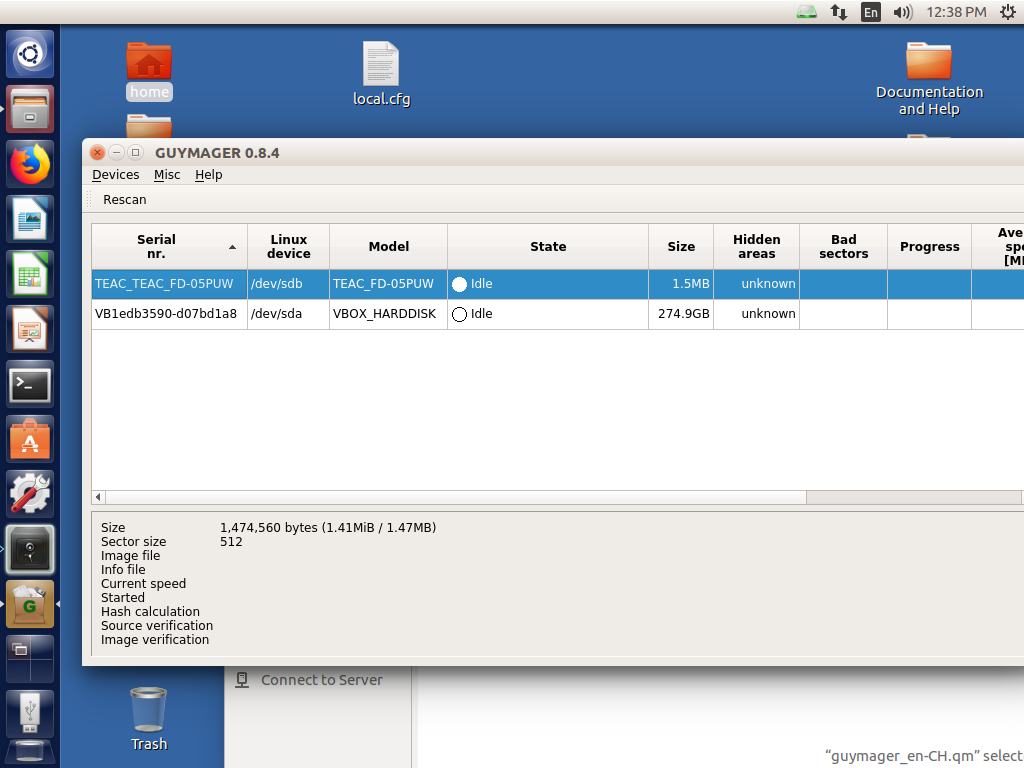
- A dialog box appears in Guymager where you can choose settings for the imaging process.
- Select Expert Witness Format for the disk image, but increase the split size to PiB in order to keep the image as one file (unless the file needs to be split so it can be moved easier).
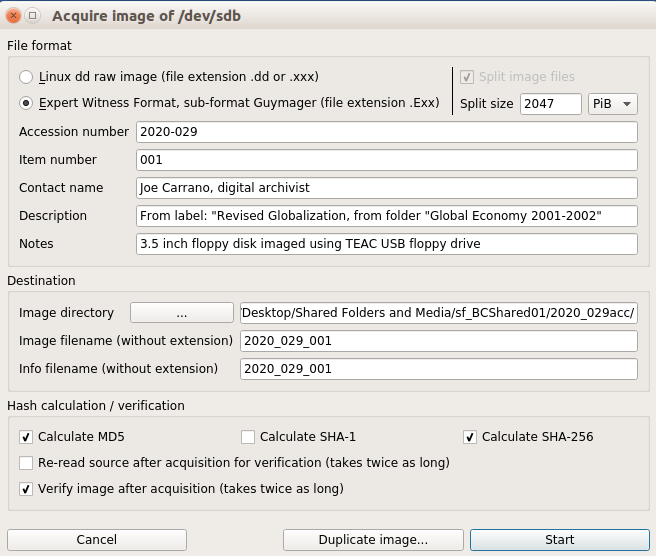
- For accession number, put the accession number.
- For the item number put the item number (in other words, the number appended on the end of the accession number and labeled on the item, for example 001).
- For contact name, enter your name, role, and DDC, MIT Libraries at the end.
- For the description, transcribe a label or supply a description of the content of the media if known.
- In the note field, describe the type of media being imaged or other relevant information. This field may have a serial number or device name pre-entered, keep this if it seems correct or useful but it can be deleted otherwise.
- For the image directory, select the directory for the accession disk images.
- For the image filename and info filename, the the same name as the image directory, but instead of acc appended the item number at the end (such as 2020_029_001).
- Select the options for MD5, SHA256, and verify image after acquisition.
- Select Expert Witness Format for the disk image, but increase the split size to PiB in order to keep the image as one file (unless the file needs to be split so it can be moved easier).
- Click start.
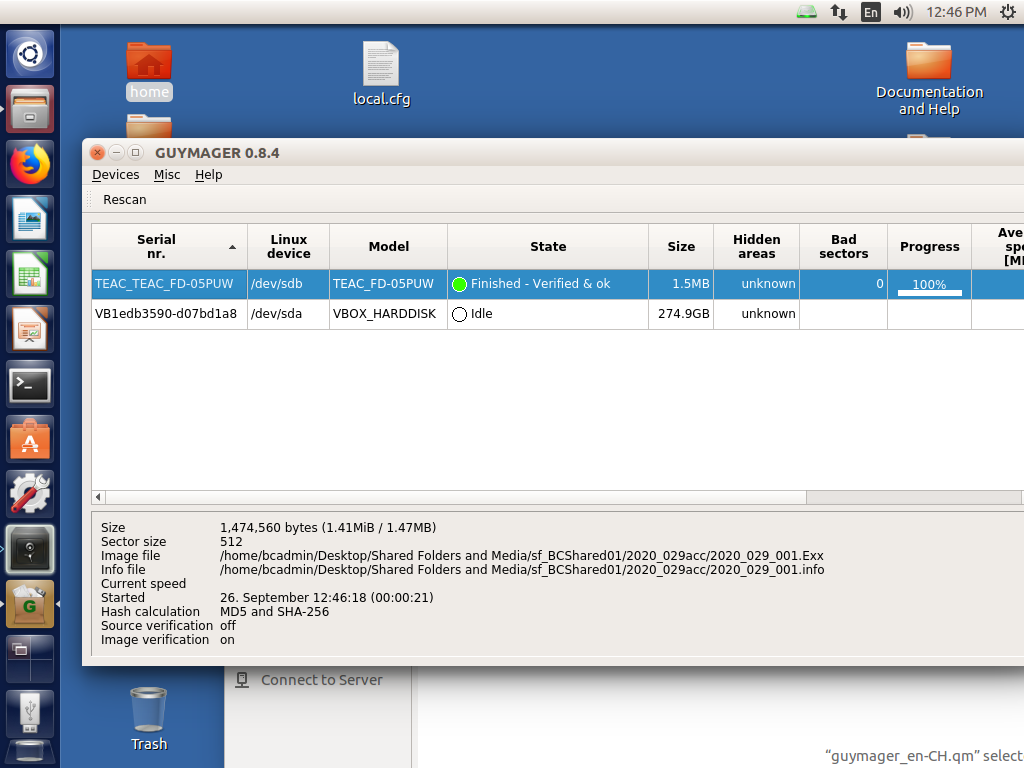
- When imaging is successful the screen will look like this:
- You may encounter that portions of a disk/drive may have bad or unreadable sectors. This often will not cause the imaging to fail but you may consider imaging with another tool if unable to extract and/or access files or there appears to be items missing when performing steps later in the processing workflow. It is not uncommon for there to be errors in older media.

- If imaging fails or has too many errors, try again or try using FTKImager or Kryoflux (in the case of 3.5” disks). If problems persist, consult with the digital archivist.
- Once the imaging is complete, proceed to the next item in the collection or proceed to the disk image extraction section if extracting images immediately. If you are need to wait a month or more before processing the files, move them into backlog in Archivematica by starting with the Preparing for Archivematica steps.
- If you are continuing to image items with Guymager, it will retain the accession number, contact name, and image directory location. This will save some time when performing data entry but if you’ve moved on to a different accession etc., be sure to check that this information is correct.