Fillets
...
all fillets were machined in the deep, we started out using Todd shop but his limited hours lead us to prefer the deep
Stock: 1" x 1" x 24" 6061 from McMaster
Process:
- use a bandsaw to cut stock roughly to length (make sure you cut them slightly longer than you want them as the bandsaw is not super precise e.g. you cannot make 4 6" fillets out of one 24" long piece of stock)
- use the face mill to face the stock down to size (it was .86" x .88" for us)
- make sure to deburr the corners as you go to make sure the stock lays flat in the vice as you are machining it
- use a 1/2" endmill to machine the longer dimension of the fillets down to size (5" for the sustainer fillets & 8.5" for the booster fillets)
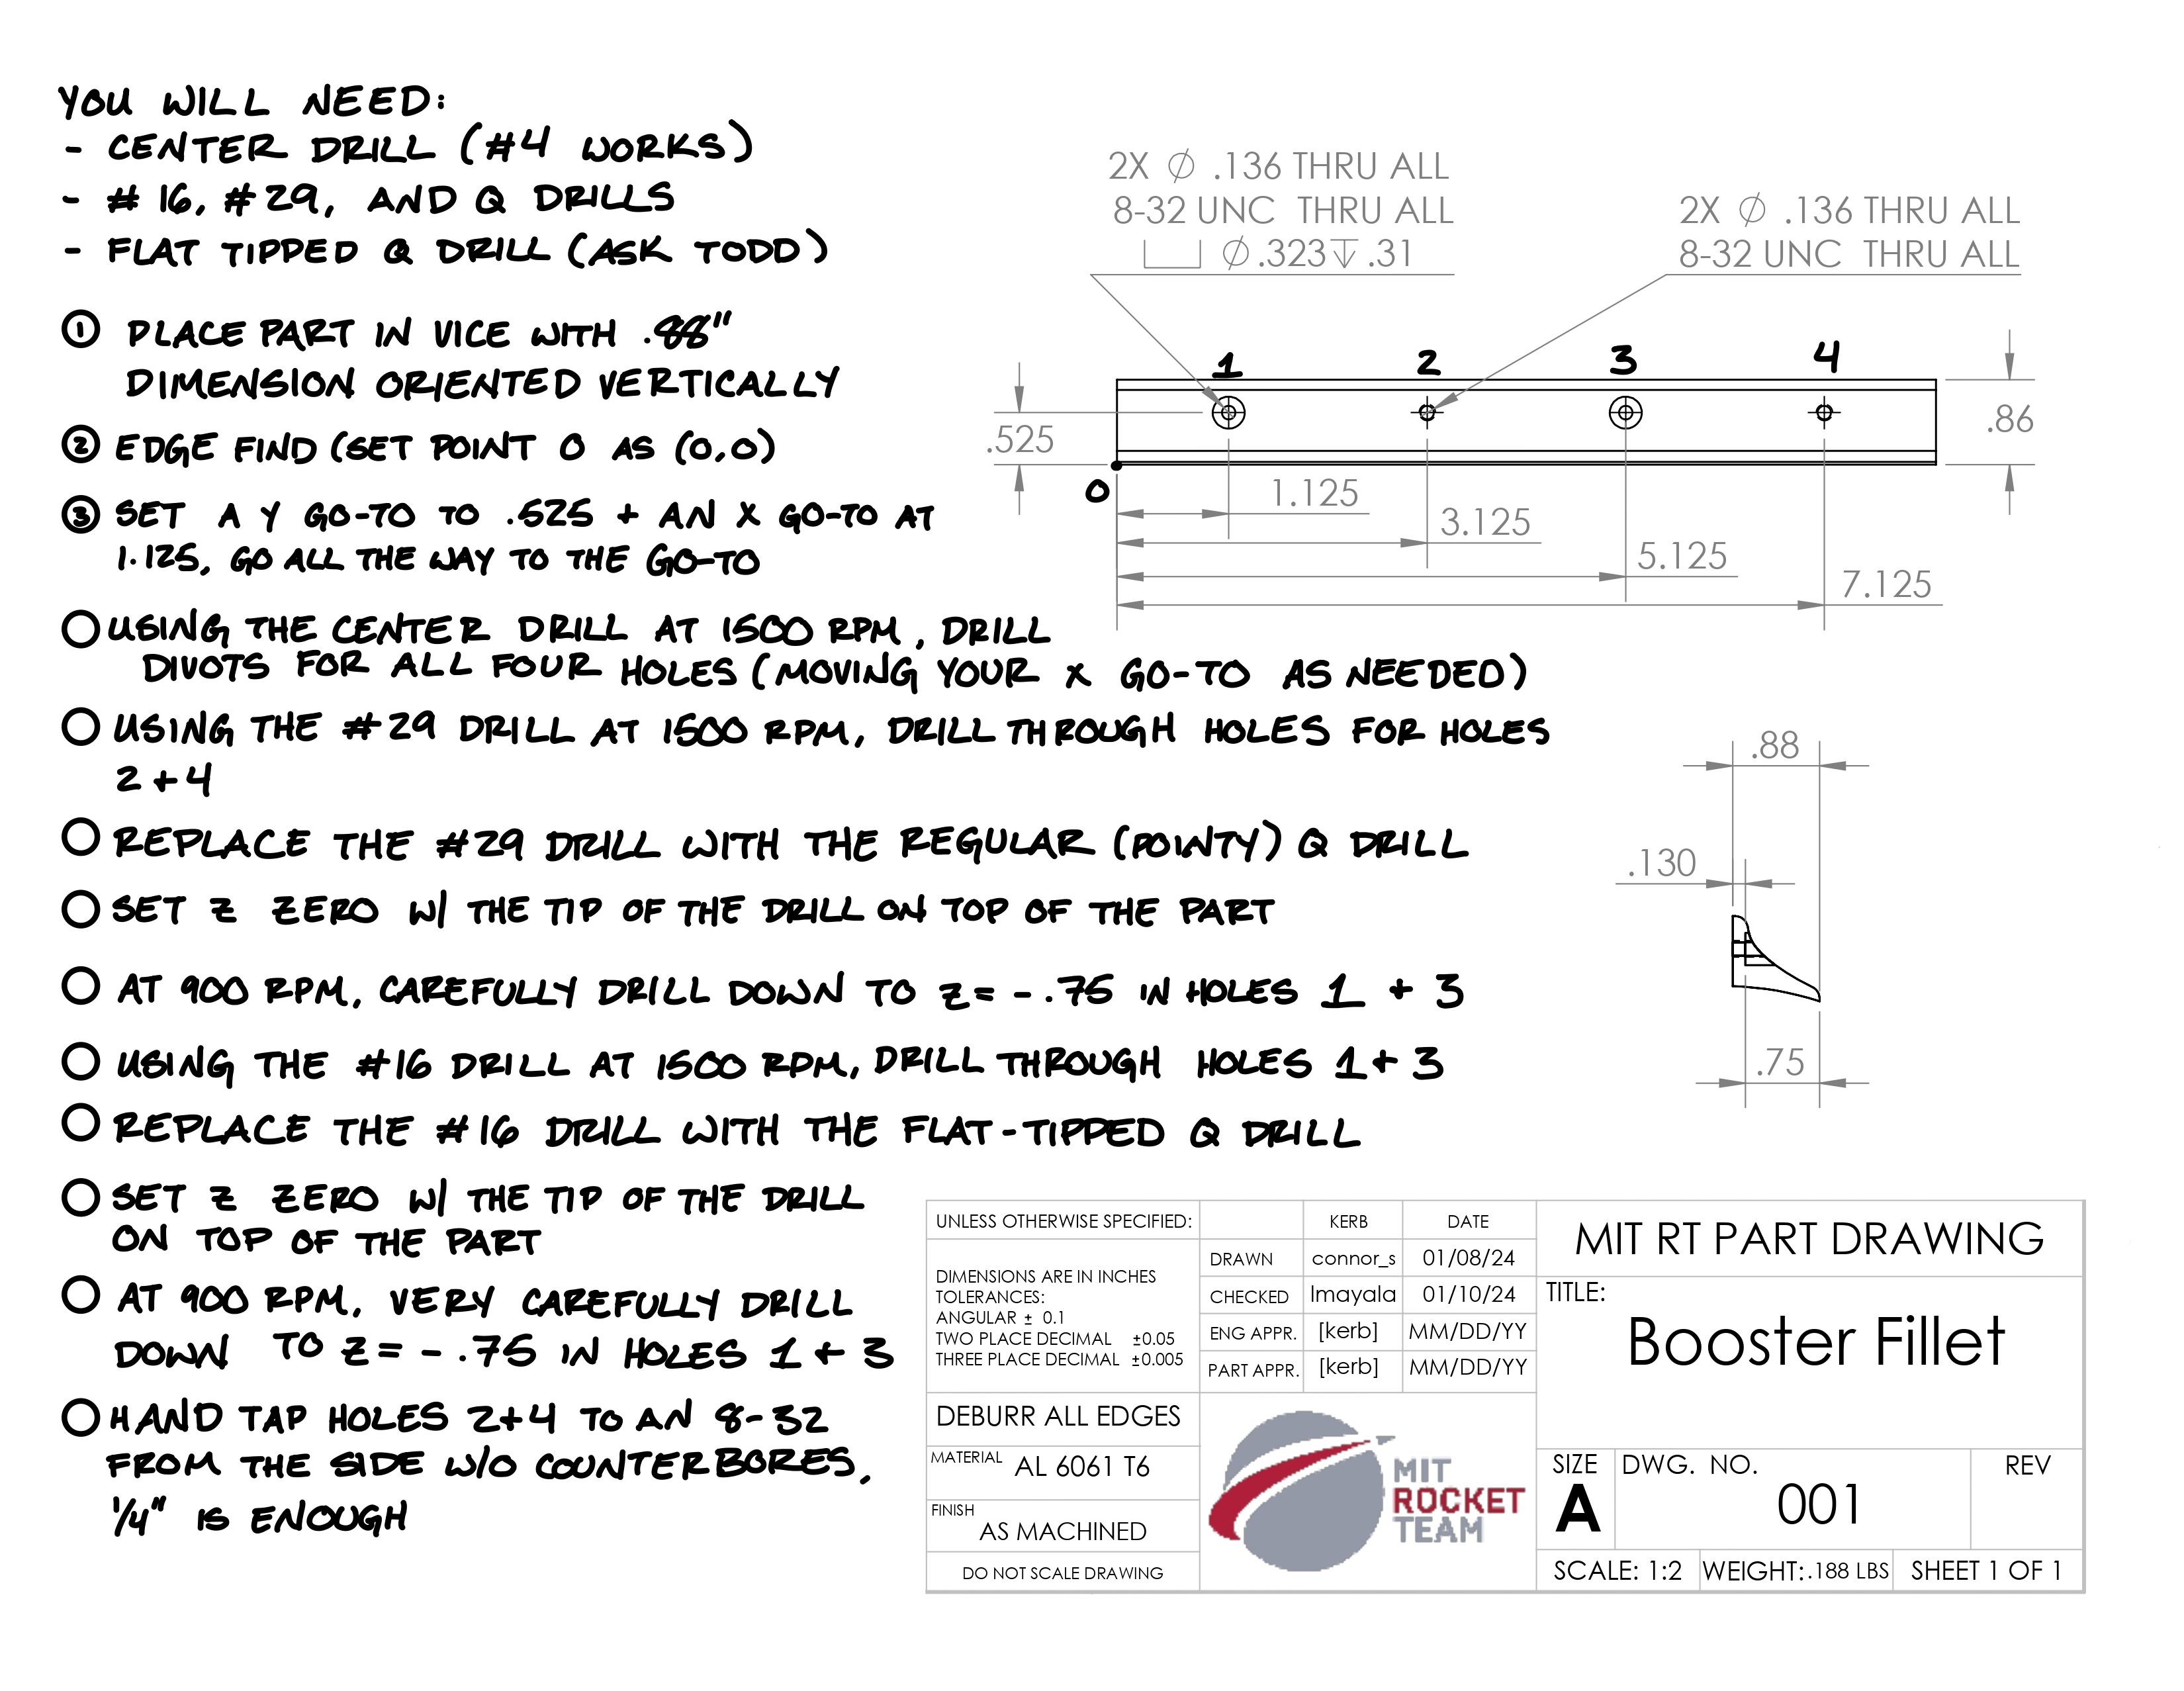
- drill the holes
- after the pivot to machining in the deep, we switched to using a 1/4" flat endmill with the mill in 2-axis mode to machine circle pockets to flatten out the bottom of the holes instead of using the flat-tipped Q drill
- the process for the sustainer was identical except for the fact that the holes were in sightly different locations
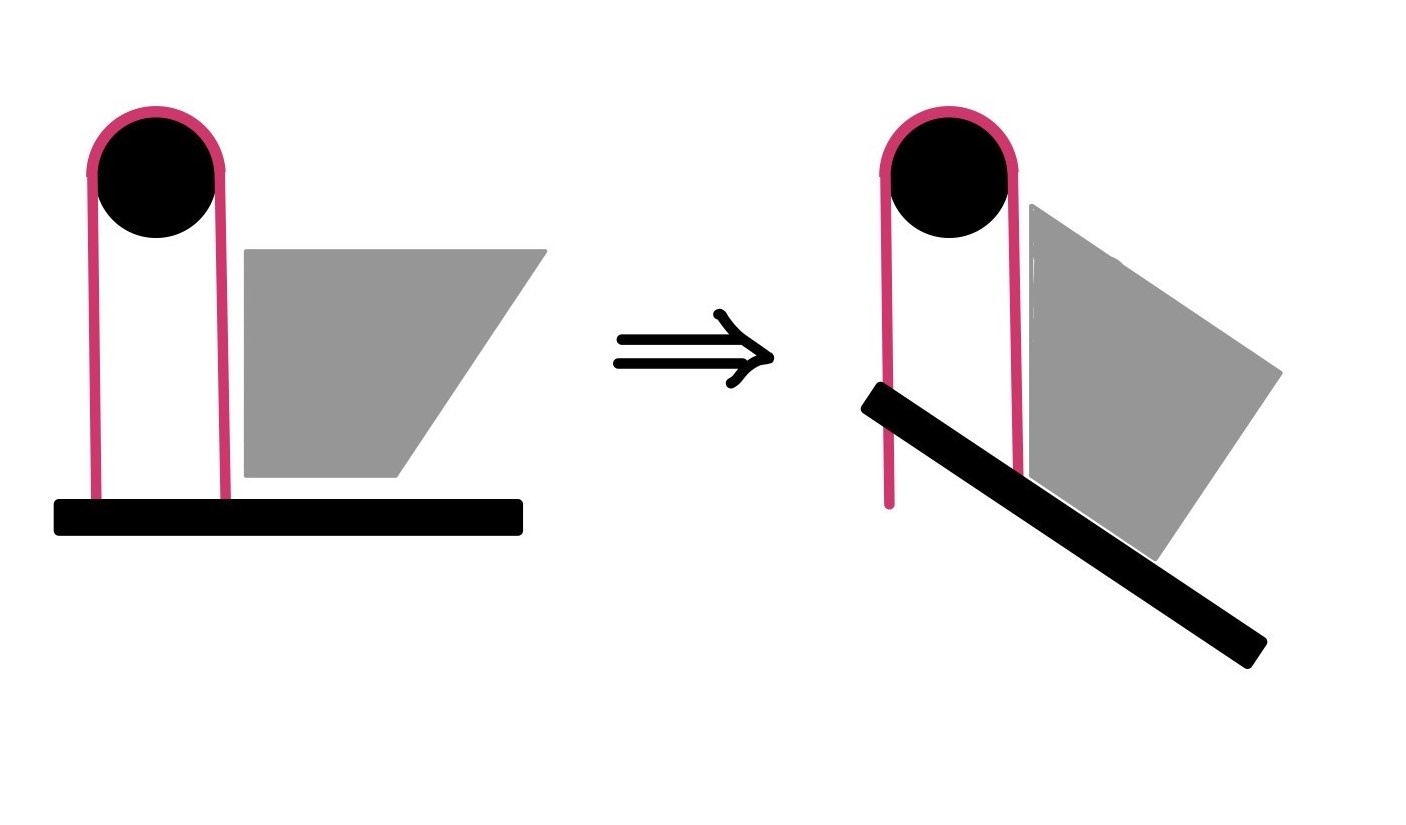
- run the CAM program for the smaller cut (the side that interfaces with the fin can
- attach the fillet to the jig
- run the CAM program for the long cut (the side the faces the air)
CAM:
our CAM went through A LOT of iterations, here are the main takeaways:
- unless you absolutely cannot create a profile without a 1/8" endmill (this is probably not true, this would require that you have a radius somewhere that is smaller than 1/8") do not use an 1/8" endmill
- in general, use the biggest endmill you can get away with (we used a 1/2" flat end for roughing and a 1/2" ball end for finishing) this reduces machining time and give you a better finish
- if you have a lot of CAM to run and it's going to take a long time, you should probably use a haas (area 51 has one, other places might as well) these are enclosed CNC mills that use flood coolant and can run much faster than the mills in Todd shop or the Deep
Fins
...
these needed to be the last things to be manufactured as we needed final CGs of the stages so keeping manufacturing for these simple was really important
Stock: 24" x 24" x 3/16" 6061 from Online Metals
Process:
- waterjet the fins in Todd shop, including the holes for the screws
- round the leading and trailing edges of each of the fins
- we found the best way to do this was to use a file to get a rough profile and then using a belt sander to finish the edges
- moving the bed of the belt sander to get the leading edge of the fin to be flush with the belt was very helpful
Transitions + Screws
...
All of the transitions were 3d printed out of PETG, the only problem we had with them is that the forward transitions needed much looser tolerancing than we anticipated to fit over the motor case, it seems about 10 thou tolerance was good
The screws were all cut down to 5/8" using a hack saw as the screws we wanted did not come in that length. If you can avoid having to cut down screws, you should, it is labor and time intensive and you have to be pretty careful to make sure the cut ends are smooth enough to be able to thread correctly.
Assembly
...