Create and Store Thalia's Training Videos:
Download/Uploading files to the SVN
1. Set-up:
a. Get access to the SVN:
i. Find someone who can add you to the Moria group "zest-cvs". Mike Gettes can do this.
b. Install SVN client:
i. MacOS: SynchroSVN (not free)
ii. Win: Tortoise (free)
c. Download the following SVN folders to your desktop:
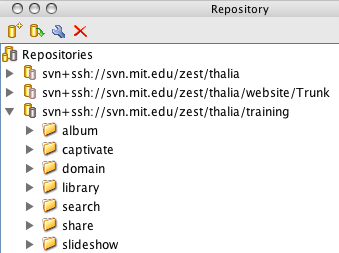
i. Training (svn+ssh://svn.mit.edu/zest/thalia/training/
ii. Quickstarts (svn+ssh://svn.mit.edu/zest/thalia/website/Trunk/quickstarts)
2. Save the video:
a. Create the project in Captivate.
b. Save the final project (.cp) file to the "Training" folder
c. Publish the video to the "Quickstart" folder, overwriting whatever previous version was there.
(The SVN saves every version; don't worry about overwriting and killing the previous version.)
d. Proof the video
e. After proofing, immediately delete any project/published files that are not in your SVN folders. (If you need to work on them again, copy them from your SVN folders.)
3. Upload to the SVN:
a. Upload your "Training" folder (the SVN will upload only changed files).
b. Upload you "Quickstart" folder (the SVN will upload only changed files).
c. Report to your project manager that the newest .cp project file and published video have been uploaded to the SVN.
d. Ask your project manager when you may expect to see the video put up on the staging platform.
4. Check #1:
a. After the video has been uploaded to the staging platform, proof it again.
5. Check #2:
a. Ask your project manager to proof the video on staging.
b. If the video is correct, it is ready for release to production.
Create Thalia Videos
Thalia's QuickStart videos are created in Adobe Captivate 3.
1. Download and install Captivate:
a. Download it from: svn+ssh://svn.mit.edu/zest/thalia/training/captivate.
b. Install on Windows.
2. Global settings for Thalia's videos:
a. Custom size - 900 x 593
b. Check "Full Motion Recording".
c. Uncheck "Record Narration".
d. Center red outline around Thalia's UI.
(Most recording will not require the UI header.)
e. Runtime should be 2:30 - 3:30.
f. Naming convention - area#.cp (library1.cp, library2.cp, library3.cp).
g. Audio - recorded into captions; do not make one long audio track.
3. Settings for Captions:
a. Title caption -
i. 530 x 125 pixels
ii. Runs for 5 seconds in a blank space.
iii. Centered in the video window.
iv. Style:
1. Title - 15pt, bold, Verdana
2. Subtitle - 11pt, bold, Verdana
3. Color - same as others in its group (never grey).
(continue to next page)
b. Slide captions -
i. 350 x 65 pixels.
ii. Color is "halo".
iii. Always centered in Thalia's "browser" area, and usually near the bottom.
iv. Style -
1. Caption - 11pt, Verdana, bold.
2. No more than two lines per caption.
3. Color - halo
4. Very short captions might be better in shorter boxes.
c. Audio -
i. Record audio into each caption; do not record one long audio clip (this makes edits impossible).
ii. Record without extraneous noise, keyboard, or in a "loud" room.
iii. Pay attention to pronunciation, and try not to sound bored. A lot of people will be listening to your voice.
d. Publishing the video -
i. Naming (follow current Thalia QuickStart naming conventions):
1. Lower case plus video number - (library1, library2, library3 and so forth).
ii. Skin - "Glass"
iii. Publish it to any folder. Do not save to your SVN folder yet.
e. Saving to the SVN -
i. Copy the project file (xxx.cp) to the appropriate sub-folder in the "Training" folder.
ii. Copy the published video folder to the "Quickstart" folder.
iii. Commit these changes to the SVN.