You are viewing an old version of this page. View the current version.
Compare with Current
View Page History
« Previous
Version 9
Next »
How to create a wiki page (IN PROGRESS AWAITING TEMPLATE)
- Open your browser of choice (Firefox or Internet Explorer)
- Access the MIT Wikis Dashboard
- Select Monograph Cataloging Documentation
- Consider bookmarking this page for ease of access at later dates
- Select the page under which your new page will fall. You should judge if the new page belongs immediately on the Libraries Monograph Cataloging page or if it falls under one of the other "second level" pages. If it falls under a "second level" page, select that page.
- The page you choose to add from affects the hierarchical page tree on the left-hand side of all pages, so take care to choose wisely from the beginning.
- Run your mouse over the Add button.

- In the drop-down menu, select Page.
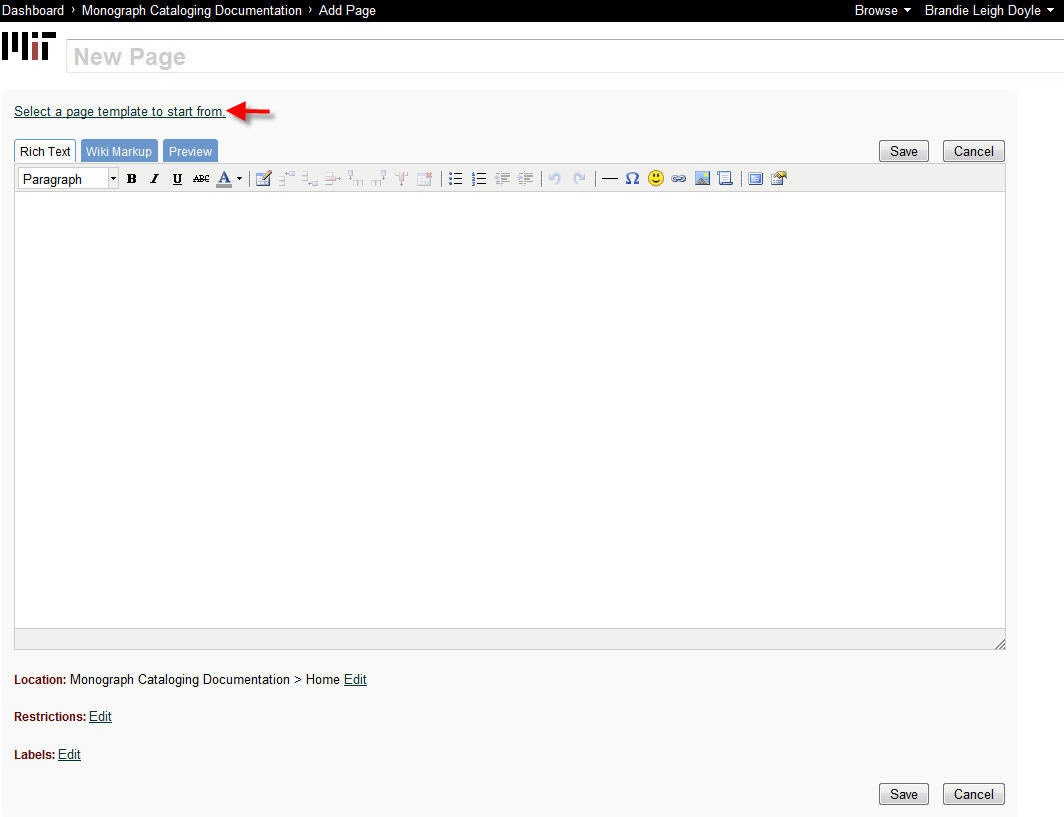
- When the new pages opens, click the SELECT A PAGE TEMPLATE TO START FROM link.

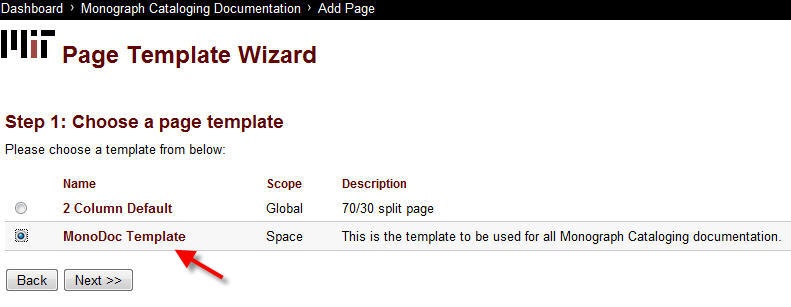
- Select the MonoDoc Template and click NEXT.

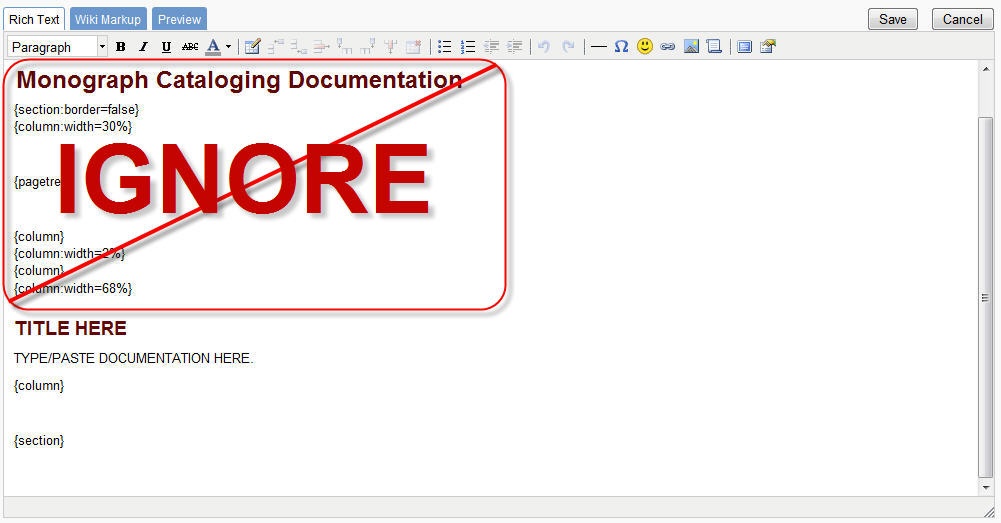
- The template will automatically fill in your editing pane with structural code.
- Type or paste the appropriate title where it says New Page at the top of the editing page.

- Ignore the text found at the top of the rich text pane, from “Monograph Cataloging Documentation" through "column:width=68%"
- DO NOT EVER MAKE ANY CHANGES TO THE ABOVEMENTIONED TEXT! It sets the parameters of the page and should be left alone.

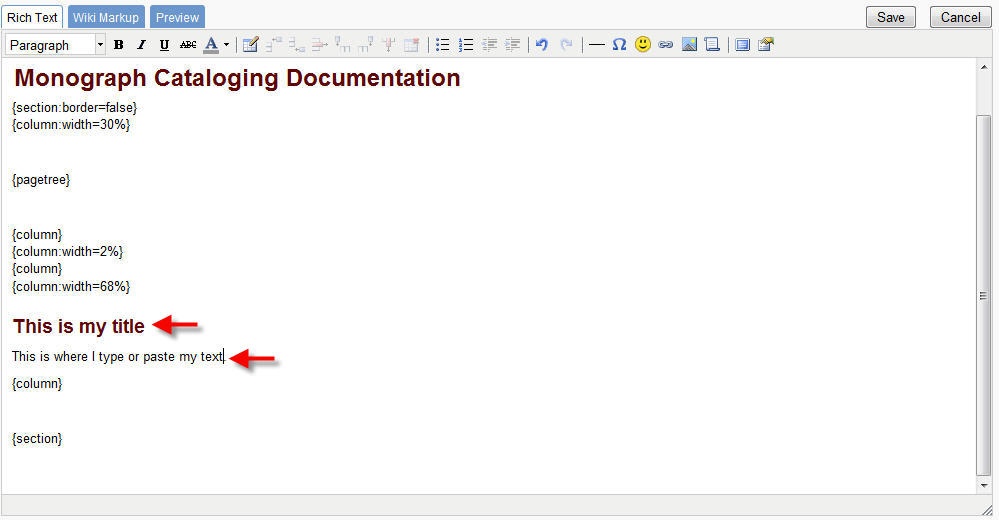
- Type or paste the appropriate title where it says TITLE HERE in the rich text pane.
- Type or paste the content of the documentation where it says TYPE/PASTE DOCUMENTATION HERE in the rich text pane.
- NOTE: if you are copying from a Word document, the rich text pane may have problems reading the font. To prevent this, you may paste the documentation in the Wiki Markup tab where it says TYPE/PASTE DOCUMENTATION HERE. This will automatically convert the text to the appropriate font.

- Use the toolbar at the top of the pane to adjust text, insert symbols, or build a table. Separate instructions explain how to insert a picture or add a link.
- To preview your changes, choose the Preview tab.
- When you have finished making edits, click the Save button in the lower right-hand corner.


