Exactly is a tool for creating bags (based on the BagIt specification). If you are acquiring material that cannot be sent remotely or are confident that material being transferred is very straightforward and doesn’t need to be scanned for viruses, PII, or characterized before entering Archivematica, we can put it in a bag to ensure the transfer has checksums (to ensure nothing changes when moved) and some minimal metadata. Exactly currently has a 150 GB limit per transfer, if you are moving content that exceeds that limit, please consult the digital archivist.
If you are using Exactly on your personal work Mac, you may have to download and use Exactly 0.1.4 as users have reported version 0.1.5 not working for them.
Note
If you are receiving files already bagged (for instance, transferred from the Scanning Lab, you can skip to the validating the bag step.
Creating and transferring the bag
- Click on the Exactly icon on the Desktop.
- Go to Exactly> Import and select the location of the Exactly metadata template that matches the type of transfer you want to complete (e.g. Manuscript Collection, MIT Records, MDCS Transfer).
- In the Metadata section, fill out the fields with information about the transfer. Contact-Name should be your name and info (the person doing the transfer/processing). Add any additional fields and information as necessary.
- Name your bag in the Title field, this should be the accession number followed by “acc” for instance “2020_099acc”. This will be the name of the folder produced in the new location.
- For the Source, use the Browse button to select the location where the files currently reside.
You can select individual files or full folders. Use the + symbol next to the Source field if you need to add multiple files, etc. in different locations.
If you don’t want a folder and name retained in the transfer, navigate inside of it and select all the files/folders within.
Note
Exactly will not work with a path directly to a file at the top-level of a drive, such as X:\filename.txt. If selecting individual files you will need to have your files within a sub-folder and select individual files.
- For the Destination, select the location where the files will be going to, on Windows: [drive letter for submission]:\Transfer (for example X:\Transfer) or on Macs: /Volumes/submission/transfer, for items that are ready to go through Archivematica.
- Click the Save button in the metadata section.
- Click the Transfer button.
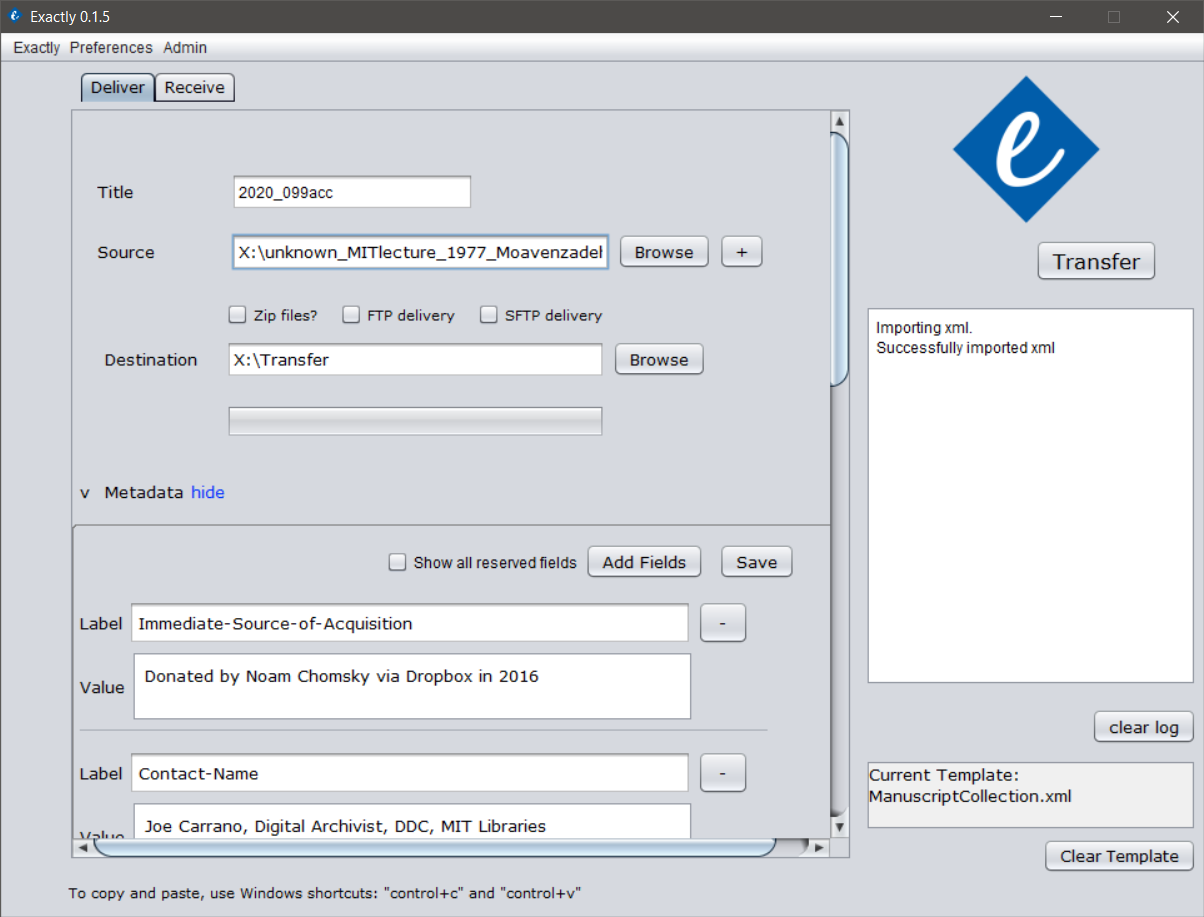
- Progress will show in the log box on the right (for large transfers there may not be any indication of progress for a while). If the transfer succeeds, proceed to the next section. If it fails, try again or contact the digital archivist.
Validating the bag
Once the material has been transferred, we want to validate that all the files made it correctly by checking the manifest of checksums against the checksums of the transferred files in their current location.
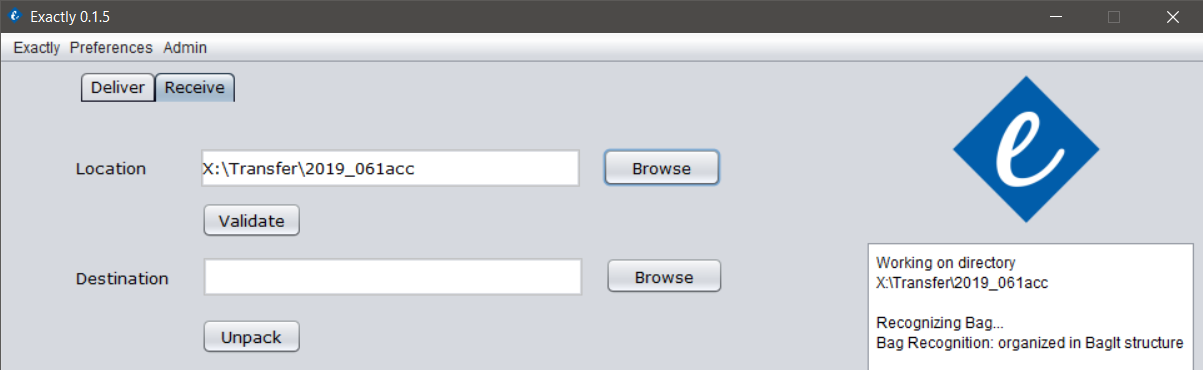
- Switch to the Receive tab in the Exactly interface.
- For the Location, use the Browse button to choose the bag you just transferred, for instance on Windows: [drive letter for submission]:\Transfer\2019_061acc or on a Mac /Volumes/submission/transfer/2019_061acc
Once selected, Exactly will automatically check to see if the directory is organized in the proper bag structure and will display the result within the log box on the right.
- Once the structure is confirmed, click the Validate button (the button below the file path). This will check to see if all the files in the bag and made it to the new location without changing.
- If the bag is valid, the log to the right will read “valid bag.” If so, you can proceed to the adding submission documentation to the bag section.
- If the bag is not valid, return to step 1 of the creating and transferring the bag section and attempt to transfer the material again. If failure persists, contact the digital archivist.
Adding submission documentation to the bag
Once you have created and validated the bag, if you have submission information (email from the donor, virus scan results, etc.), you can add it to the top level of the bag. This folder may already exist if transferred from the scanning lab.
Note
The gift agreement should be added into the relevant collection digital control folder in a subfolder by accession number. It should not be included with files transferred here.
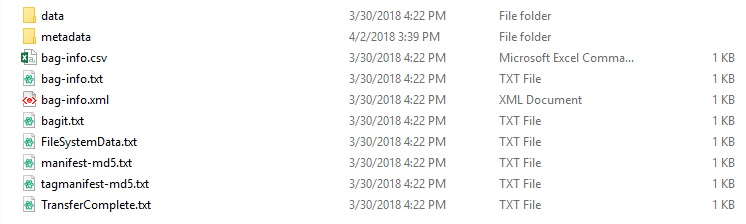
- In the top level of the bag, create a folder called "metadata".
- Within that create a folder called "submissionDocumentation".
- It has to be in this hierarchy with these exact folder names for Archivematica to be able to parse the bag once sent to submission. The top level of the bag will look something like the image below.
- Add any submission documentation to the "submissionDocumentation" folder.
- Proceed to the Next steps guidance at the start of this section.