...
- Sand inside of tube by hand with 60-grit sandpaper (this took a long time: next time use a flapper wheel, 60-grit).
- Periodically see it if fits over the motor case. If not, repeat step 1.
- Once it finally fits, sand with 220-grit sandpaper to give it a smoother finish.
- Now it's time for the tube layup. Prepare the layup jig (make sure it's stable, put a pole over it and wrap it with Mylar so that once you start the tube layup, the tube doesn't stick to it)
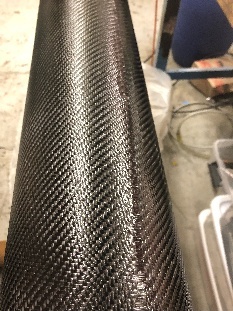
Carbon fiber is difficult to work with because it snags and frays easily, so make sure whatever surface you're using is completely cleared off. Also make sure that this surface is large enough for the entire piece of carbon fiber, because the fiber will warp if it overhangs.
Length (in) Length + Offset (in) Outer diameter (OD) of tube Circumference of phenolic tube (OD x π) Length of phenolic tube Cut out Mark a (INSERT DIMENSIONS) piece of area on the carbon fiber . This was using painter's tape and cut along the tape. It's much easier to cut on tape than cutting the fiber directly, to avoid snags and make sure the dimensions are correct. The dimensions were determined using the table above.
- MIX EPOXX, DO LAYUP, LET CURE FOR 24 HOURS
...
- Let tube cure at room temperature for at least 24 hours
2. Root Bond and Root Fillet
...
Sanded CF on leading edge

...
Lessons Learned
- Use a flapper wheel to sand the inside of the phenolic tube instead of doing it by hand
- Have at least three people to help with the tube layup
- Support the fin more securely while machining the G10 tab so that the phenolic leading edge is aligned with the fin (see "Hermes 2 Fin Design")
- Taper the carbon fiber cutouts only at the trailing edge
- Make sure your laser cutter is large enough for the cutouts
- Make sure the vacuum bag is properly sized (not too big, not too small)
- Have a buddy when doing the oven cure and work in shifts