...
- Phenolic tube (INSERT LINK)
- 60-grit sandpaper
- 220-grit sandpaper
- Carbon fiber (HOW MUCH)
- System 3000 epoxy (resin + hardener)
- Layup jig (wooden jig, metal pole, nuts and bolts to secure jig)
- Mylar
- Squeegees
- Popsicle sticks
- Epoxy boats or paper cup (for mixing epoxy)
- Painter's tape
- Scissors
- Ruler
- Acetone and shop towels (to clean up epoxy on squeegees)
- Gloves
- Safety goggles
- Respirator
Procedure:
- Sand inside of tube by hand with 60-grit sandpaper (this took a long time: next time use a flapper wheel, 60-grit).
- Periodically see it if fits over the motor case. If not, repeat step 1.
- Once it finally fits, sand with 220-grit sandpaper to give it a smoother finish.
- Now it's time for the tube layup. Prepare the layup jig (make sure it's stable, put a pole over it and wrap it with Mylar so that once you start the tube layup, the tube doesn't stick to it)
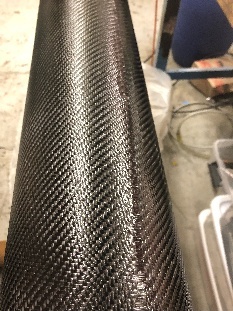
Carbon fiber is difficult to work with because it snags and frays easily, so make sure whatever surface you're using is completely cleared off. Also make sure that this surface is large enough for the entire piece of carbon fiber, because the fiber will warp if it overhangs.
Length (in) Length + Offset (in) Outer diameter (OD) of tube Circumference of phenolic tube (OD x π) Length of phenolic tube Mark a (INSERT DIMENSIONS) area on the carbon fiber using painter's tape and cut along the tape. It's much easier to cut on tape than cutting the fiber directly, to avoid snags and make sure the dimensions are correct. The dimensions were determined using the table above.
- MIX EPOXX, DO LAYUP
- Let tube cure at room temperature for at least 24 hours
- Sand tube
2. Root Bond and Root Fillet
Required Materials:
Did root bond using 5-minute. fin can jig needs to be improved
...
Says it takes 6 hours to cure, but if you're in a time crunch you can apply a new fillet every 3-4 hours.
Sand fillets
Procedure:
3. Carbon Fiber Cut-outs for Tip-to-tip Layup
The carbon fiber cutouts are the pieces of carbon fiber used in the tip-to-tip layup, which consists of laying plies from the tip of one fin, over the tube in between them, over the tip of the next fin (and repeating for the other three sides). The preparation for the tip-to-tip layup involves cutting out squares of carbon fiber and attaching them to wax/parchment paper using spray glue. The purpose of the paper is to prevent the carbon fiber from warping when it is being handled. Then, the actual shapes are cut out using a laser cutter. In general, fiber glass can not be cut on a laser cutter, but carbon fiber can, as long as the fiber is dry (i.e., not "pre-preg", referring to sheets of fiber that have already been impregnated with epoxy). Make sure that whichever laser cutter you use can fit the largest cutouts (in CSAIL, for example, the laser cutter did not fit the largest cutout so we had to do it by hand).
Quentin designed CF cutouts (6 sizes --> small to large)
Cut out carbon fiber squares and spray glue to wax paper( don't use too much spray glue)
Lasercut CF cutout - went well but largest cutout size did not fit in the laser cutter
...
Required Materials:
- 5.7 oz 2 x 2 twill weave carbon fiber (https://www.fibreglast.com/product/3K_2_x_2_Twill_Weave_Carbon_Fiber_Fabric_01069/carbon-fiber-fabric-classic-styles)
- Blue painter's tape
- Adhesive spray glue (3M or something like that, should be a red can)
- 2-3 rolls of wax paper or parchment paper
- Scissors
- Sharpie
- Ruler
- Gloves
Procedure:
*Make sure to wear gloves whenever working with/handling carbon fiber, or you will get small splinters that are not painful but very itchy!!
- *Using tape, mark squares of carbon fiber (24 squares, 4 for each size cutout, making sure there is enough room to fit the cutout with ~1 inch margin on all sides)
- Cut along tape and label which size cutout it is (1-6) on the tape so you keep them organized later when laser-cutting.
- Prepare 25 (24 for the cutouts, one extra) pieces of wax or parchment paper (if paper is too small, tape the pieces together so that they are the same size or slightly larger than the carbon fiber squares
- On the extra piece of wax/parchment paper, use spray glue to test to see how far you should hold the glue from the wax/parchment paper so that when you spray, the paper just barely sticks to your finger. If you use too much spray glue, the carbon fiber will be difficult to remove from the paper and the fibers will be warped, ruining the tip-to-tip layup.
- For the rest of the 24 pieces of paper, lightly spray the wax or parchment paper with spray glue. Use your finger to see if it just barely sticks to the paper.
- Carefully take a piece of carbon fiber (one of the squares you cut out earlier) and lay it gently onto the wax/parchment paper, smoothing out any imperfections and making sure the piece is square (and not warped into a diamond or other shape).
- Laser-cut carbon fiber
- Select proper settings for carbon fiber
- Select proper file (make sure the size of the carbon fiber square matches with the cutout file- this is why labeling the carbon fiber earlier is important)
- Place carbon fiber in bed of laser cutter
- Make sure there are no loose pieces of wax/parchment paper curling up, as this will get in the way of the laser-cutter
- If you have room, weigh down the carbon fiber (but only after testing the path of the laser cutter, or you may damage it if it runs into the weight)
- Turn on the exhaust
- Cut! You may have to cut twice, so make sure you don't move the carbon fiber or the cutout will be messed up when you cut it for the second time.
- If you see small areas smoldering (meaning slightly glowing, NOT a flame- fire is bad), keep the laser cutter door shut and wait until it extinguishes. Opening the door would cause oxygen to enter and the smoldering to get worse.

4. Preparation of Vacuum Bagging Materials
...
- Peel ply (light-blue)
- Release film (should be light red, make sure it's perforated)
- Bleeder fabric
- Vacuum bag material (Stretchalon 800, resistant to up to 400F)
- Ruler
- Scissors
Procedure:
Prepared vacuum bagging materials
...
- System 3000 High Temp Epoxy Resin + Hardener
- Squeegees
- Popsicle sticks
- Epoxy boats or paper cups
- Paint rollers (LINK)
- Acetone
- Shop towels
- Scale
- Respirators
- Gloves
- Large sheet of Mylar (to protect surface from epoxy during layup)
Procedure:
Mark centerlines on tube and CF cutouts
...
- Vacuum tape
- Vacuum bagging materials from previous step
- Painter's tape
- Layup jig (wooden jig, metal pole)
- Scissors
- Vacuum pump (pump, fixtures)
- Respirators
- Gloves
Procedure:
Vacuum bag was 32 x 38" (this is TOO BIG, make smaller next time. For the test fin can though the bagging was too SMALL, so find a good middle ground)
...
Check the cure cycle for whatever epoxy you're using. In this case, we used System 3000 High Temp Epoxy, and the cure cycle is detailed below. Note that the epoxy changes from clear to amber-colored after the cure is completed.
Need 2-3 people, not just one person, and do it during the day time!
Cure Cycle for System 3000 epoxy
- Increase from room temperature to 150F at a rate of no more than 2-5F per minute
- Hold at 150F for 3 hours
- Increase to 250F (no more than 2-5F per minute)
- Hold at 250F for 3 hours
- Increase to 300F (no more than 2-5 per minute)
- Hold at 300F for 3 hours
- Ramp down to 100F (no more than 2-5F per minute)
- Do not shut down the oven and leave it to cool down

8. Post-processing
Required Materials:
Procedure:
Vacuum bagging materials were difficult to remove, but not impossible
...
- Use a flapper wheel to sand the inside of the phenolic tube instead of doing it by hand
- Have at least three people to help with the tube layup
- Support the fin more securely while machining the G10 tab so that the phenolic leading edge is aligned with the fin (see "Hermes 2 Fin Design")
- Make sure the fin can jig for the root bond is properly sized so that the fins are straight/evenly spaced
- Don't make the vacuum bag too big or it will be difficult to handle and cause creases
- Taper the carbon fiber cutouts only at the trailing edge
- Make sure your laser cutter is large enough for the cutouts
- Make sure the vacuum bag is properly sized (not too big, not too small)
- Position the fin can vertically, not horizontally, so that the fins don't splay under the weight of the fin can as the epoxy softens
- Have a buddy when doing the oven cure and work in shifts