Wiki MarkupAlthough, the wiki markup tab has been removed from the editor in Confluence 4.0+, wiki markup can still be used to enter content. You can enter markup using one of two methods: - Typing markup into the editor (the markup will be rendered in real time).
- Using the Wiki Markup window.
- Using the *Wiki Markup Macro*
| Info |
|---|
- Although you can still enter content using wiki markup, you cannot edit in markup. Confluence no longer saves content in markup but converts it to the Rich Text format.
|
Using the Wiki Markup Pop-upThe Wiki Markup window allows you to enter wiki markup without it being immediately rendered by the Rich Text editor. To use the Wiki Markup window: - In Edit Mode, click the
 Image Added button from the editor toolbar. Image Added button from the editor toolbar. - From the Insert Menu, select Wiki Markup.
- Begin entering wiki markup into the window. Once the markup has been inserted, you will not be able to edit the content as markup.
Using the Wiki Markup MacroIn Confluence versions 4.0+, content is no longer saved in markup but in HTML - this means that although wiki markup can be used by either entering it directly into the editor or by using the Wiki Markup window, users cannot edit in markup. The Wiki Markup Macro returns this functionality. Any markup entered within the macro body will remain in the markup format allowing users to edit it as such. To use the macro: - Type a bracket '{' to bring up the macro Autocomplete menu.
- Select Open Macro Browser at the bottom of the menu.
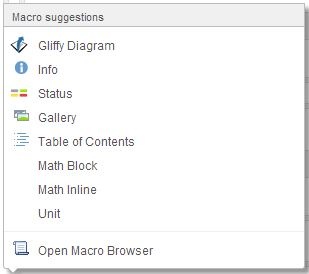 Image Added Image Added - Search for the Wiki Markup without Migration macro.
- Click Insert. This will create a window where you can enter markup. The window will keep the editor from rendering the code.
 Image Added Image Added
On the right side of the editor is a guide for formatting text within Wiki Markup. There is a link to the full notation guide at the bottom of the guide.
 Image Removed Image Removed Icon | Action |
|---|
 Image Removed Image Removed | Inserts a link into the page |  Image Removed Image Removed | Inserts an image into the page. You can either attach and insert an image or drag and drop an already attached image. |  Image Removed Image Removed | Opens the Macro Browser. For more information on see Using the Macro Browser |
Making Wiki Markup Your Default EditorThe Rich Text Editor is the default editor, you can make Wiki Markup the default editor by: 1. Click the "edit" button. The Rich Text Editor will open. 2. Select the  Image Removed Image Removed 3. Click the  Image Removed link. The Wiki Markup Editor will now open each time you click the "edit" button. Image Removed link. The Wiki Markup Editor will now open each time you click the "edit" button.
|