Managing Students
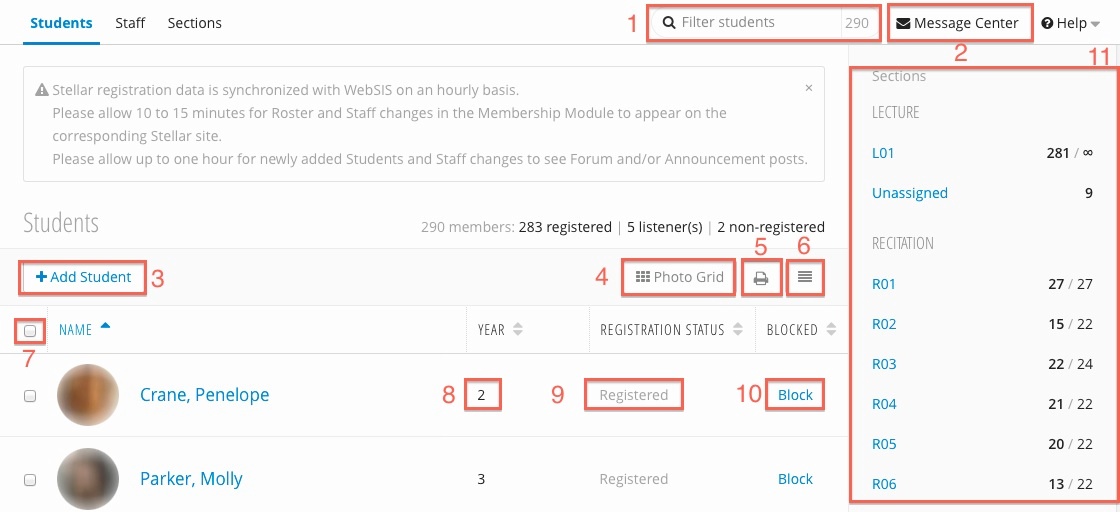
| Number | Title | Action | Additional Information |
|---|---|---|---|
| 1 | Student Search |
| |
| 2 | Message Center |
| |
| 3 | Add Student |
| |
| 4 | Photo Grid |
| |
| 5 | Print View |
| |
| 6 | Compact / Expanded View |
| |
| 7 | Student checkbox |
| |
| 8 | Year |
| |
| 9 | Registration Status |
| Note: Listeners have student access to materials and forum; no access and not listed in Gradebook. |
| 10 | Blocked |
| |
| 11 | Recitation Filters |
|
Add a Student
For information on adding sections and staff, see Adding New Staff Members and Adding a Section.
Click  (3)
(3)
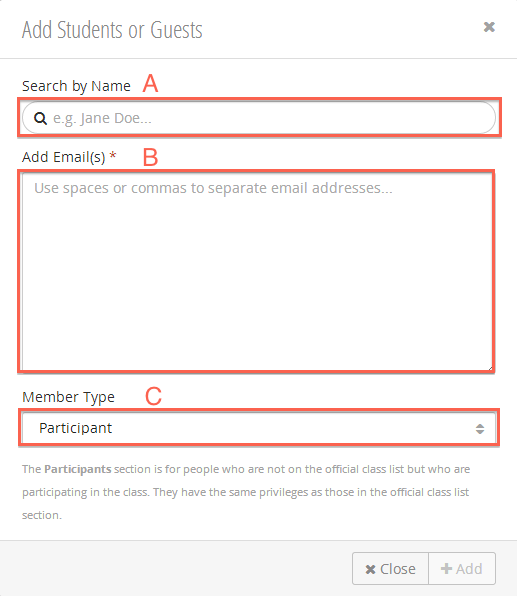
- Fill in the Add Student pop-up:
- Search Student by Name - search the MIT directory by first or last name.
- *Add Email(s)- add students by email address.
- Member Type:
- Participant - Student access to class and all related modules.
- Guest - Student access to materials and forum; no access and not listed in Gradebook.
- Participant - Student access to class and all related modules.
- Click Add
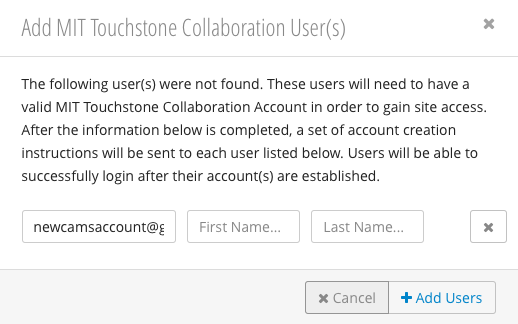
Adding a Non-MIT Account
When adding a Non-MIT account that does not already have a Collaboration Account associated with it, you will be asked to verify the email address(es) and the first and last name of the user(s). A Collaboration Account request will then be sent to each user with instructions on how to register.
Assigning Students to a Section
For information assigning staff to sections, see Assigning a Staff Member to a Section.
- Check the boxes beside the student or students (7) you would like to assign to a section. The following options will appear:

- Select the desired section from the drop down.
- Click Save.
Blocking, Unblocking, and Removing Students
Students that are registered for a class can be blocked / unblocked from the Student table. Students who are added manually can be removed.
Bulk Blocking / Unblocking Registered Students
- Check the boxes beside the student(s) you would like to block or unblock. You can also select all students using the Quick Select (4) drop down. With one or more students checked, the following options will appear:

- Click block or unblock.
- Click Save.
You can also block / unblock students from the Blocked (10) column.
Removing Manually Added Students
All non-registered, manually added students, will have a Remove button in their table row. Click it to remove the student.

Filtering the Student's Table
Filtering by Section
For more information on Sections, see Managing Sections.
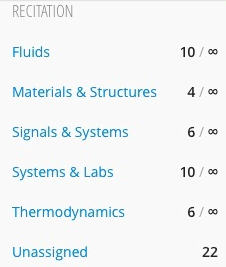
The Student Table can be filtered by section (11). Clicking on the section name will display only students assigned to that section. The numerals beside the section names indicate the number of assigned students and max capacity.
Filtering by Student Name

You can filter the Student Table by entering text into the Student Filter (1). The numeral beside the Student Filter indicates how many students are currently displayed in the table.