...
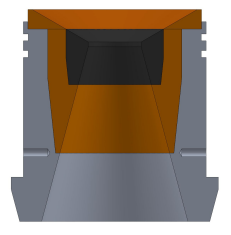
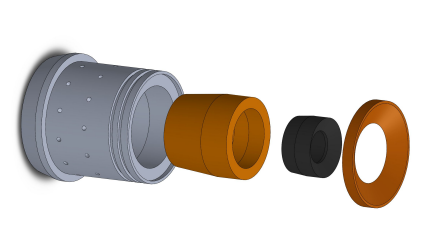
One example is machining the booster nozzle assembly. These are the four parts of the nozzle assembly. We have the aluminum nozzle carrier, the phenolic insert, the graphite insert, which has the throat of the nozzle, and the phenolic nozzle cap. To machine this, we would use the bandsaw to cut stock to size, the lathe to make cylindrically symmetric cuts, and the radial indexer to make the bolt holes. Here is a rough procedure of what we would do for the nozzle carrier, for example. 1. Hold from bottom with material left over. 2 face. 3. Cut down outside 4. Cut notches 5. Bore in hole 6.Renove and take to radial indexer to bore out holes for bolts 7. Cutoff part used to hold 8. Put in lathe other way. 9. Cut outer notch 10. Cut outer angle.
Now, we move onto assembling the whole rocket motor
Dry Fit
Grainbond
Assemble nozzle and FC with RTV, set aside to cure
Grease and install o-rings in the nozzle and FC
Coat the liner with grease and install into case
Install closures into case and secure with bolts
Seal nozzle if storing for more than a day or two
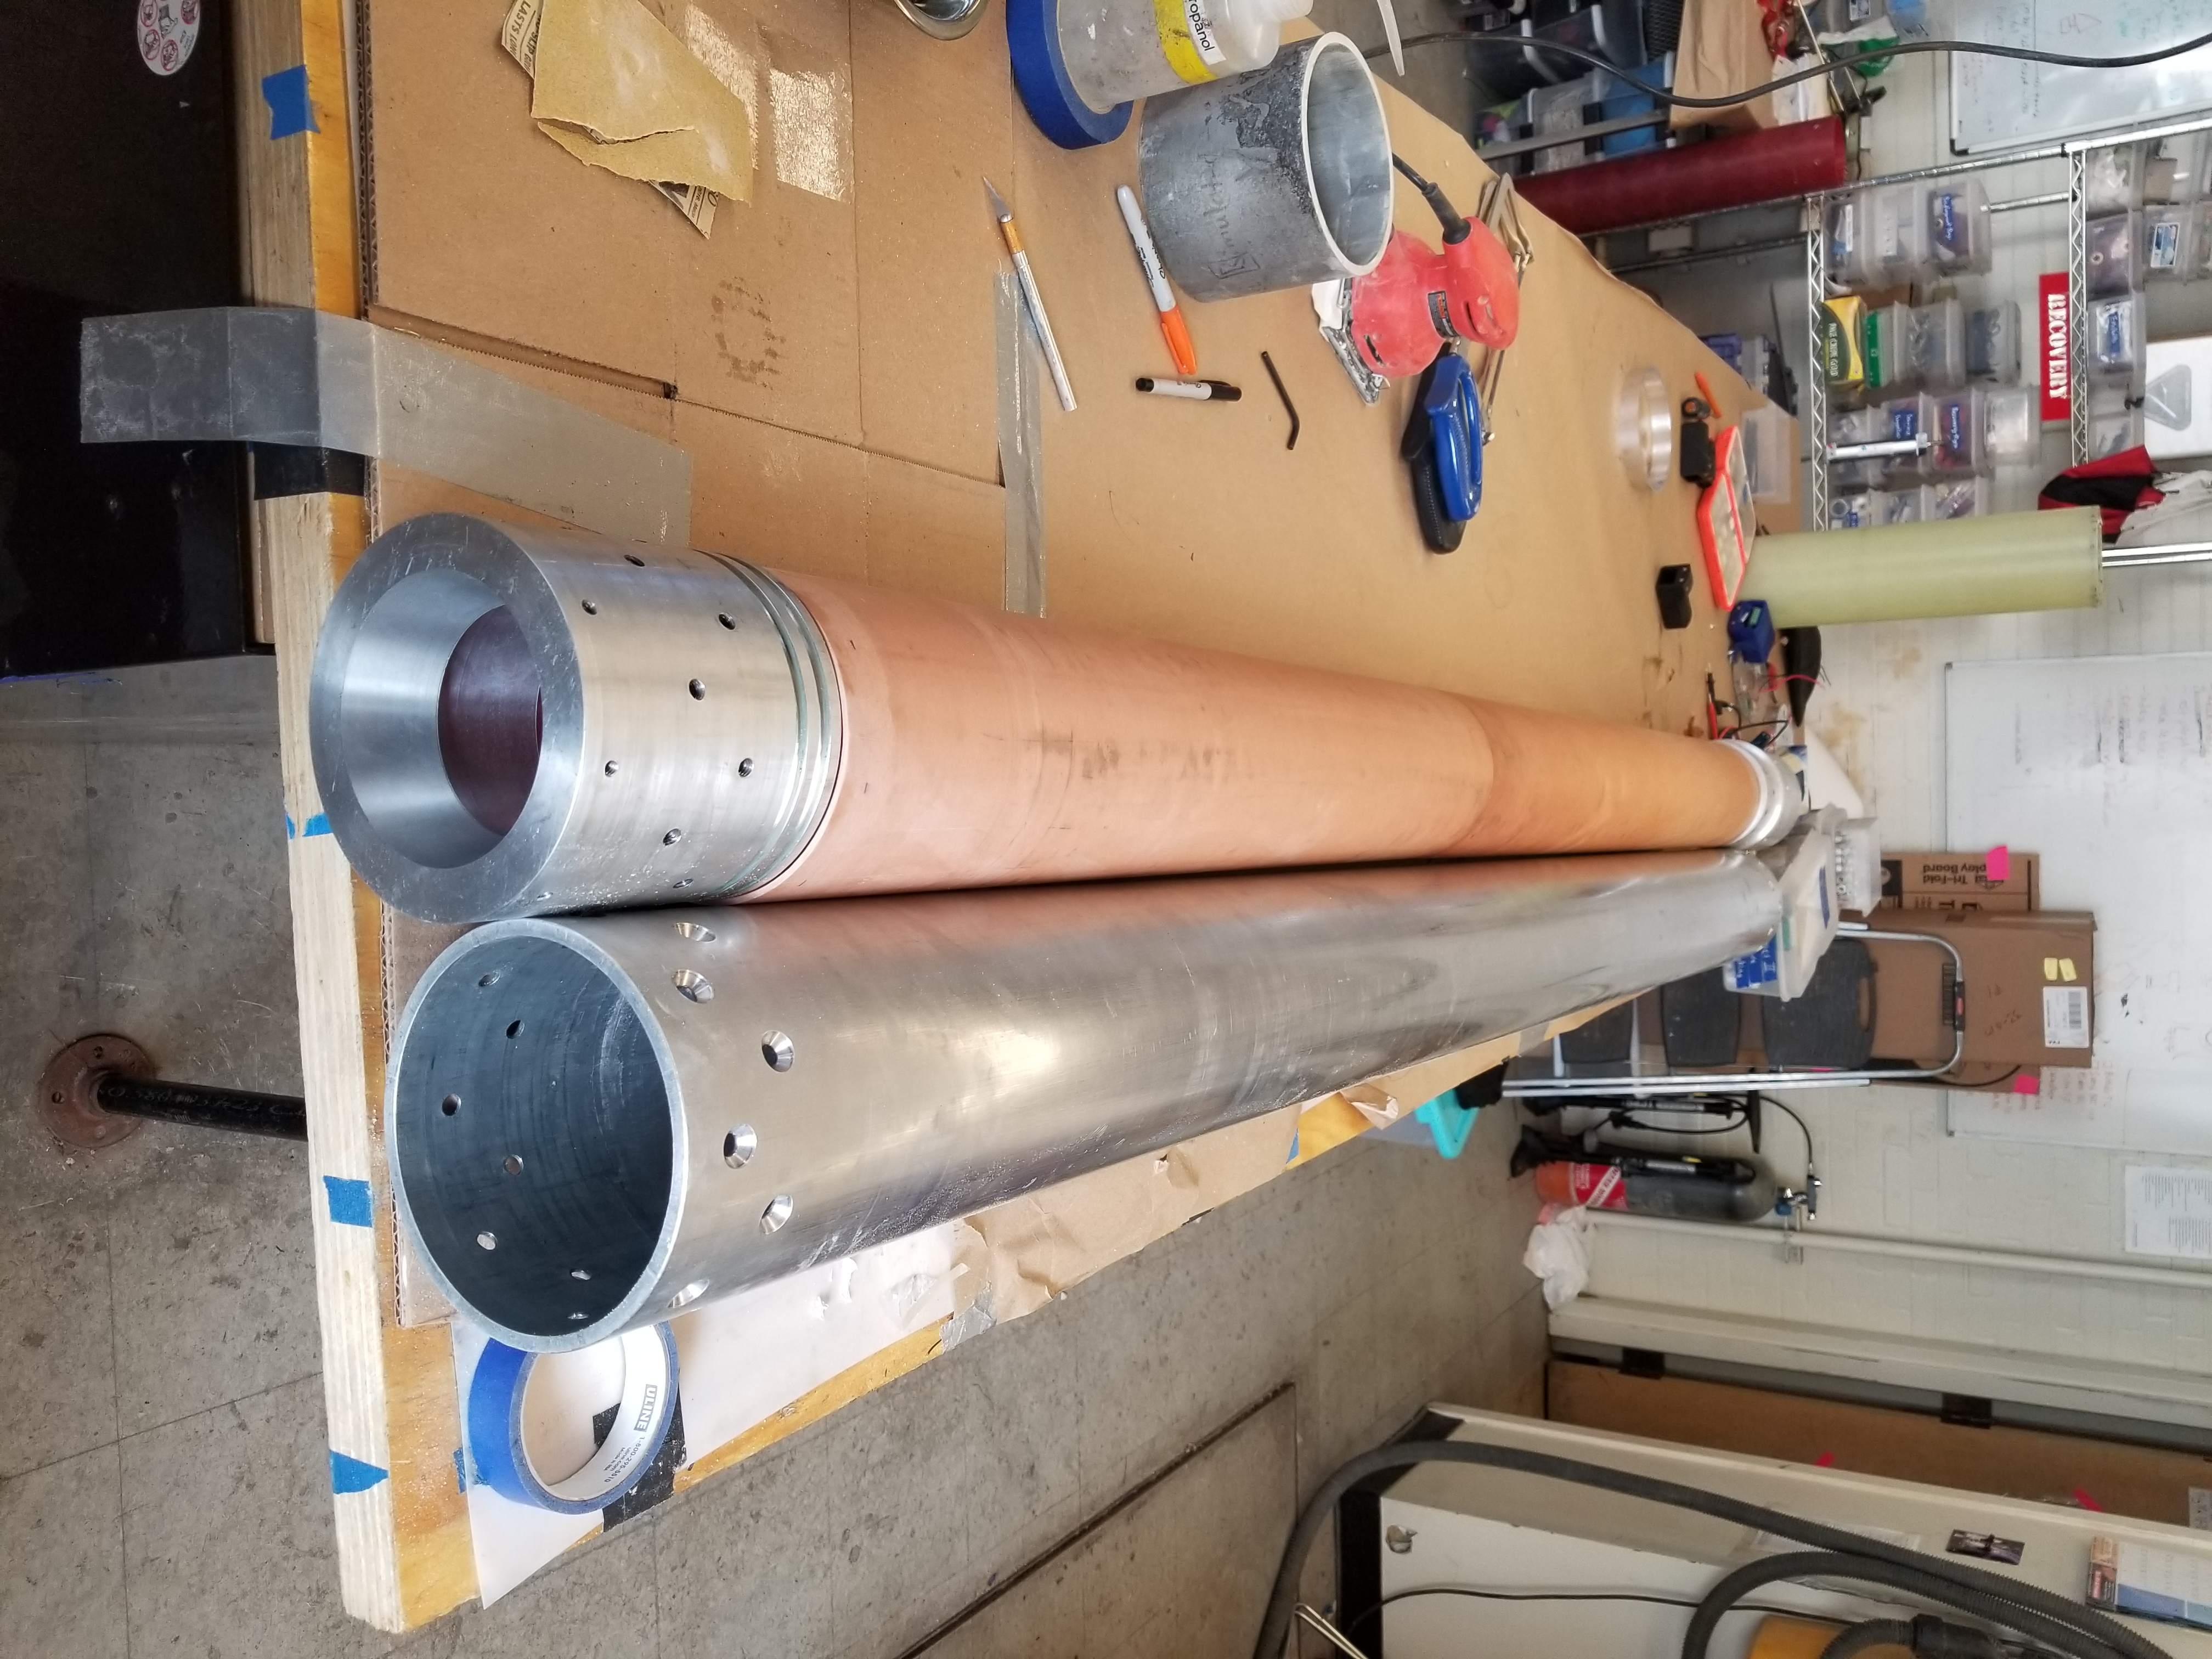
A dry fit is the first step in the assembly process. We put together all the components without glue or grease. This makes sure everything can actually fit together, and verifies the dimensions. Always do this before final assembly to avoid costly mistakes
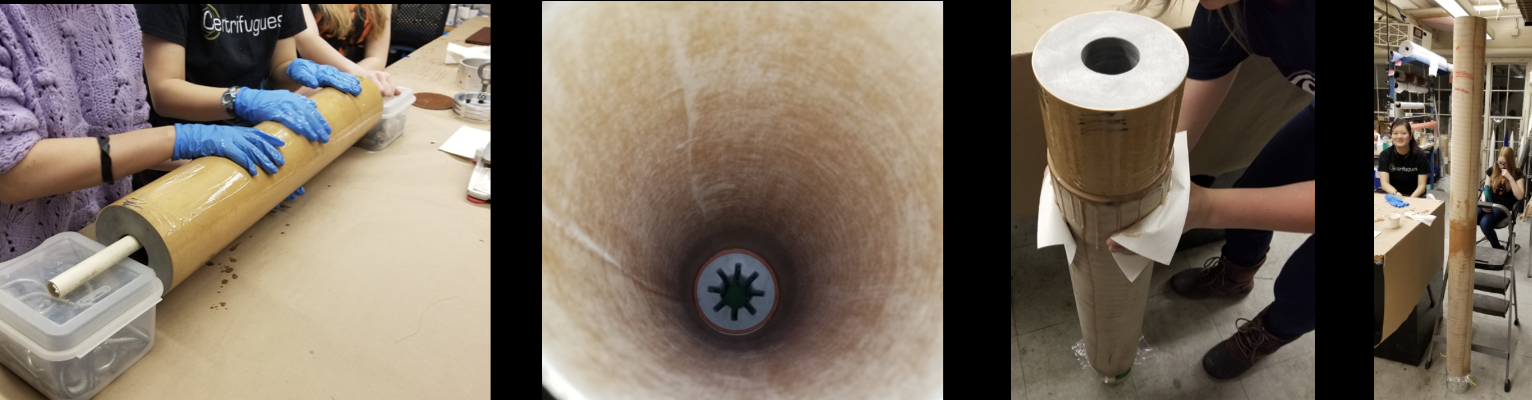
The next step is grain bonding. If the motor is made of separate grains, you must bond the m to the liner. We’ve had good results using laminating epoxy and RTV. Before assembly, weigh the grains, and include a spacer o ring between grains to allow the faces to burn.

After this, we assemble the nozzle. We glue the graphite insert into the phenolic liner, and the liner to the aluminum holder. We add o-rings to ensure a proper seal, and insert that to the motor case, and screw everything together

The forward closure follows a similar assembly procedure to the nozzle

Then, we slide and glue in the liner and grains into the case

This is the final assembled motor, with all the grains, nozzle, and forward closure attached securely.